


Chapter 8: Samus vs Dark Samus
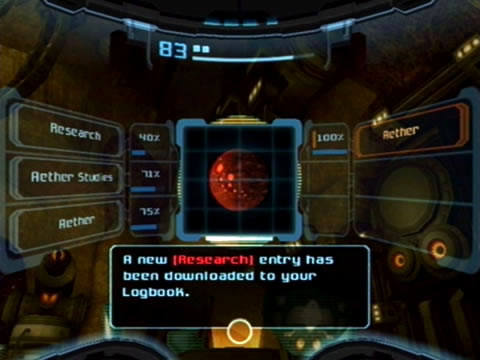
Lots of data to collect here with the Scan Visor.
Only problem is that security gate can only be raised when energized by a blast of the Dark Beam's energy. So no luck for now. Look for a narrow tunnel right next to the gate and follow it to reach a red blast shield. Blow it off and head inside to find yourself back in the Command Center, inside the glassed enclosure. Scan the red terminal in the center to raise the massive blast door that sealed earlier upon your first arrival.
Head back down to the Command Center and proceed through the now-accessible door. Inside you'll find a dark corridor guarded by two nasty looking turrets up on the ceiling. Scan one to reveal them as Humility Class Turrets - these ones are far nastier than those simple turrets guarding the GFMC's base. Strafe around to avoid their fire and quickly take them out with missiles. Proceed down the corridor, timing your movements when passing through the roving laser fields.
Blow the red blast shield off the door ahead and move through. Inside you'll discover a large chamber where a trooper transport sits idle across from you. Quickly scan the vehicle (revealed as a Pirate Skiff, all they need now is a sail barge) for your Logbook before the Pirate Trooper nearby takes off and retreats onboard the skiff.
Watch out for a lone trooper firing at you from the catwalk up above. With the area clear take a look around, the wall in the corner (and right next to the door) houses your first glimpse at this game's Metroid presence. If you walk close the little trooper will try to break out of its holding tube but can't so you're safe for now. Activate the elevator behind you and ride it up to the top floor. Move around the catwalks (take note of the door in the corner requiring the Dark Beam to get through) and take out the two Pirate Troopers appearing near the large Metroid enclosure.

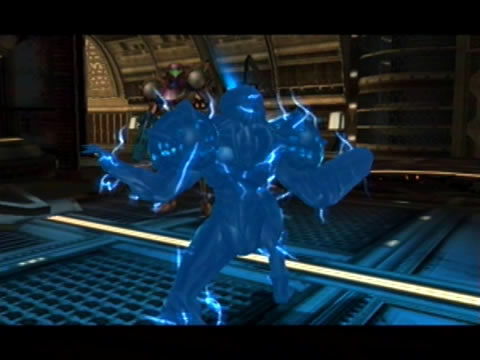
Dark Samus gears up for the first of many fights.
Up ahead in the enclosure's a nasty sight - three Metroids are feasting on a dead trooper above a pile of raw Phazon. Scan one for your Logbook, you'll discover that these specimens were transported from Tallon IV - that wouldn't have been easy. Move around the enclosure while scanning the Metroids in containment tubes along the way. On the other side of the enclosure you'll find a Pirate log for your Logbook - in it they mistakenly assume Dark Samus is the real Samus - time to prove them otherwise.
Exit the room via the lone door opposite the enclosure and immediately destroy the turret pointing at you in the narrow tunnel beyond. Head inside the circular chamber to discover a security gate blocking the exit. Use the Bomb Slot in the center to rotate the gate, opening your path ahead. Proceed through to discover the huge Bioenergy Production chamber beyond. Go further in to be greeted by two Pirate Aerotroopers - scan one for your Logbook before engaging.
Strafe around to avoid their fire, use missiles to home in on them to overload their jetpacks. Watch out as just like on Tallon IV these creatures will kamikaze into you when their jetpacks overload. With both taken care of a control terminal nearby will power up and you'll hear the familiar (and quite intriguing) puzzle theme play. You exit is a way above on the ledge opposite the entrance, so you'll need to work out a way to get up there.
Walk over to the control station housing the glowing and active terminal. Scan the two terminals beside it for more Pirate info before scanning the red terminal itself. Doing so will raise the three huge "storage racks" in the center of the room. Now you'll be able to use the terminals on the other side of the room to manually arrange the racks into a giant staircase to reach the door above.
Head on over and scan all the blue terminals first for extra info. The two red terminals at each station control the storage racks directly opposite them - the left terminal lowers a single storage unit while the right raises one. Now before we position the racks to allow passage up to the exit, there's an Energy Tank waiting for you on the ledge opposite the door.
Conquer Samus' nemesis and watch its spectacular exit.
So let's position to racks to reach it. Start with the far-left storage racks. Position the racks to produce a working staircase to reach Energy Tank AW.02. With that tucked away, reverse the staircase so that it reaches up to the door on the northern side of the chamber. Climb up to the door and head on through. You may have noticed a green door atop an out-of-reach ledge on the eastern side, but don't worry about it for now.
In the next corridor you'll discover a wall with a narrow opening. Use the Morph Ball to squeeze through, inside you'll discover a series of tunnels, with the main tunnel below blocked by ever-present force field beams. You'll need to get above those beams and destroy the small generators atop each with a bomb. Access the first tunnel above you and destroy the first generator to take out the first field below.
Keep ascending the tunnels, just watch out for the series of red laser fields littered about. They'll periodically appear and disappear, time your movements to sneak by when they're powered down (you'll see three red flames just before they appear). Eventually you'll reach the second generator, blow it off to uncover the tunnel below.
Now if you pass through here again you can head through via the lower tunnel and won't have to deal with the annoying red laser fields again. Exit the tunnel and blow off the red blast shield on the door. Inside you'll discover a Save Station, save your game before moving on (don't forget to scan the terminal behind it for a Pirate lore).
Beyond this Save Station you'll discover a large ornate half-pipe partially filled with sand. Walk down the sand ramp and quickly take out the two Humility turrets emerging from the far wall. The glass enclosure up on the wall remains inaccessible for now, instead use your Scan Visor to locate a weakened Brinstone wall section in the corner. Blow it open with a missile and head through. Beyond you'll discover the Main Reactor area. As you enter the room all exits promptly seal themselves. Hear that eerie tune playing? Get familiar with it - whenever you hear that you'll know your buddy is nearby.
Ahead through the glass you'll see a large area below comprised of a central column full of Phazon, looks like this place powers the entire facility (can you see someone down below beside the central column?). Walk around the tunnel ahead to find yourself blocked in by a security gate and a door with a black blast shield. There's no way out now, you'll have to jump down the opening into the main area below.

Samus' first Beam upgrade - the Dark Beam.
As you jump below a cutscene will play - you'll confront Dark Samus as it saps the Phazon from the central column. After staring each other down and exchanging a few shots at each other you'll have your first official confrontation with the creep. Check the bosses guide for tips to keep this monster failing.
With Dark Samus finally beat it'll release a resonating blast, destroying all glass objects in the room before dropping to the floor and bursting into a million tiny blue particles. With the room clear an elevator will promptly lower down in the corner, that's your ticket out of here. Up above you'll find a lone door awaiting. Go inside to find a small storage chamber and your latest prize - the Dark Beam.
Before leaving make sure you scan the terminal nearby for your Logbook and grab some health from the crates if need be. Now that you have the Dark Beam you'll see a new number displayed on your HUD below your missile count. This represents how many shots you have left in the Dark Beam - you'll start off with 50 but can eventually find ammo expansions to increase it.
Fire a shot from the Dark Beam at the door to open it up then head back inside to the Main Reactor. Energize the crystal on the security gate ahead with the Dark Beam to open up passage beyond. From here you can head back to the Save Station nearby and save your game before leaving.
Chapters:
- Planetfall
- The World Divided
- Fate of the Federation Troopers
- The Plight of the Luminoth
- The Sands of Agon
- Dark Aether
- The Space Pirate's Lair
- Samus vs Dark Samus
- Unlocking the Dark Agon Temple
- Restoring the Energy Controller
- The Journey to Torvus
- The Everlasting Deluge
- Restoring the Flooded Temple
- Taking the Fight to the Ing
- Expanding Samus' Arsenal
- The Underwater Temple
- Securing the Dark Torvus Temple
- The Path to Sanctuary
- The Mechanical Marvels of Aether
- The Sub Guardian Nightmare
- Subterranean Conquest
- Searching the Fortress
- Retrieving the Charge Combos
- Following the Echoes
- The Screw Attack Returns
- The King of all Mechanoids
- Gearing up for the Finale
- Unlocking the Sky Temple
- The Final Treasure Hunt
- Ending the War