


Data
Guides and strategies
- Techniques Guide
- Power-up locations
- Bosses Guide
- Mini-bosses Guide
- Search View Guide
- Obstacles Guide
- Walkthrough
- Game endings
- Secrets and tips
- Game maps
Media
Chapter 12: An Artificial Winter
Look for this vent to bypass the Super Missile iced-door.
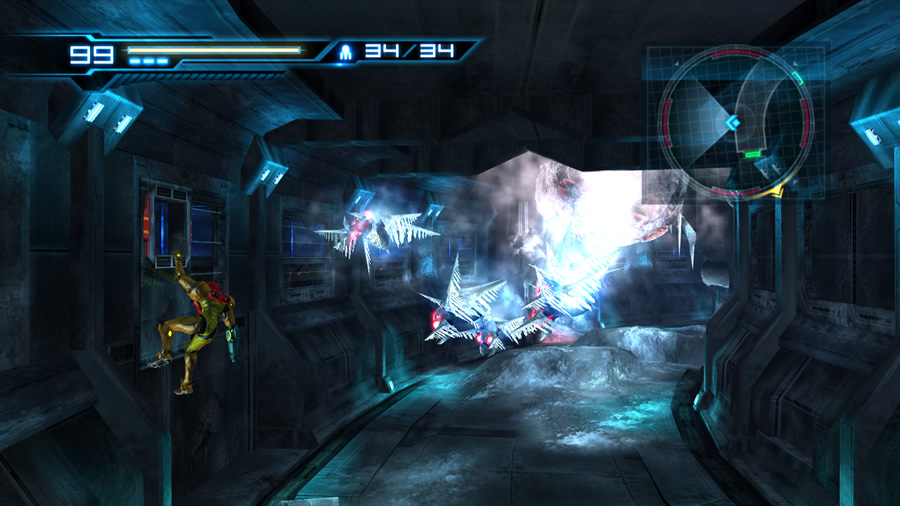
Leave the Navigation Booth behind, only to be immediately greeted by an emerging swarm of Himellas from a Fly Pod. Clear all the targets and step through the curving corridor to find the exit covered in thick ice. Targeting the obstruction reveals that only a Super Missile can break through.
Adam still won't give us Super Missile access yet, so there must be another way through. Sure enough, look closely at the curving wall - can you see a narrow blue-lit tunnel running along the inside of the wall? Backtrack to the entrance of the corridor and look for a small tunnel opening on the left.
Climb inside and follow the path, but pause as you reach the vent spewing cold air. If you try to roll past the vent as the air rushes from it, you'll be deposited back into the corridor again. Wait for the air to stop before moving onward. A second vent awaits up ahead, but don't worry about this one - the tunnel changes direction at that point. Move through the hidden tunnel to find yourself arriving on the other side of the ice-covered door.
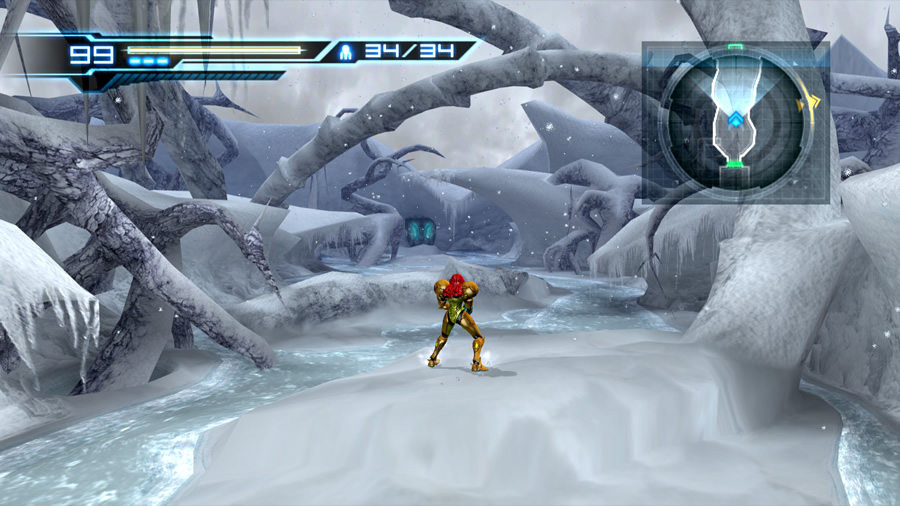
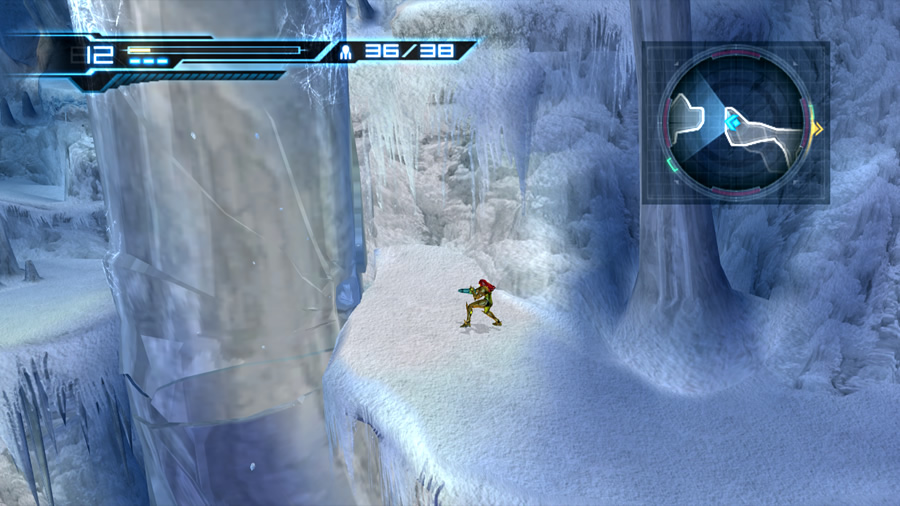
You're now standing at the head of a long outdoor area with a gorgeous view of an illusory cloud-filled sky. Huge parabolic tree-like trunks enclose the path, snowflakes fall from the sky, and narrow streams of water flow along the ground to complete the scene. Walk forward to the far side of the area where the exit awaits. This region is curiously quiet and peaceful, but not for long.
Eventually the game will show a small section of snow and ice crashing to the ground. As soon as you see this, begin tapping the D-Pad rapidly. The camera will then swing to the left as a weird purple-and-beige humanoid creature leaps out at Samus. Miss the Sensemove opportunity and you'll suffer damage.
This creature is a Kyratian, one of many you'll face deep in Sector 2. Its attack patterns are fast and relentless, so check the mini-bosses guide for more details. Try to learn their attack sequences quickly (luckily, each Kyratian tends to utilise the same attack patterns). Do not underestimate them on Hard mode.
Defeat the Kyratian to unlock the door ahead. Don't forget to find Missile Tank S2.03 through the small tunnel opening beside the door. Beyond here lies an even larger outdoor area. A group of Volfons immediately hop down from above - try to avoid taking any damage from them (especially in Hard mode). Clear all targets to restore calm to the region.
This serene environment belies an enemy encounter.
While you're no doubt enjoying the scenic views deeper into this region, a Gigafraug leaps down to bar Samus' path. Don't waste any time engaging the beast. Check the mini-bosses guide again if you need help. Once the Gigafraug's down, check your health and use Concentration if it's low. Step towards a huge frozen waterfall at the southern end of the region.
If the Gigafraug didn't stomp and crash its way through the waterfall, enter first-person view and send a Missile into the facade. The blast will crack the obstacle and produce a small hole in the rigid waterfall - a perfect fit for the Morph Ball. Climb inside the alcove and drop a bomb to completely dismantle the waterfall.
Climb up into the exposed cave to find an exit. Step through to locate an indoor chamber, home to Snomers and a seemingly dead-end. Ruined pipe sections litter the background, so we won't be using those to proceed. If you're critically low on health but not low enough to use Concentration, take a hit or two from the Snomers, then quickly retreat outside and use Concentration to restore your health.
Back inside the Snomer chamber, step towards the wall on the right. Two of the little fellas climb around on the wall - can you see a small opening below them? Enter Morph Ball mode and jump inside there to find the way forward. Wall-jump up the enclosed shaft and step forward, passing another group of Snomers to reach the other side of the region.
Battle music will begin to play before you leap down - move onward to locate a pair of unlikely Dessgeegas. Defeat them both to unlock the nearby door (try to avoid taking any damage on Hard mode). Don't forget to climb inside the piping above the door to eventually locate Missile Tank S2.04.
Leave this chamber to arrive at a long narrow indoor cavern, home to two small lakes (and some beautiful light sources pouring in from outside). A Kyratian awaits further inside, and courteously launches electric orbs at two hanging stalactites, knocking them down into the water to create handy stepping stones. Enter first-person view and quickly send a Missile at a third stalactite to complete a path to the Kyratian's position (see if you can shoot down the distant stalactite before the Kyratian retreats further into the cavern - if you time your strike it's possible that the stalactite will hit the Kyratian in mid-air and knock it into the water!).
Leap across to reach the Kyratian and challenge the creature to a duel. Follow it to a solid snowy area in the centre of the cavern. See if you can knock the beast into the lake - Kyratians explode instantly upon contact with a large body of water. A second Kyratian hangs out at the far end of the cavern - it'll likely send electric orbs at you during your battle with the first Kyratian. Simply Sensemove any projectiles to avoid the hassle. If you happen to fall into either lake, simply backtrack to reach semi-dry ground.
Quickly shoot down the stalactites, but don't be caught off-guard by Kyratian fire.
Conquer the first Kyratian and move towards the second. Knock down more stalactites above the second lake to reach the far side. Firing at the second Kyratian from a distance doesn't work, as your foe will simply perform a barrel roll and deflect your projectile (has it been playing Star Fox recently?). Defeat this Kyratian to unlock the door, and don't forget to pick up Missile Tank S2.05 before leaving.
Through the door is your next Navigation Booth, so save your game to reveal more of the map. This next segment of the map appears to circle around to a large L-shaped corridor near the entrance of the sector. The next marked Navigation Booth is right across from the broken bridge back in the large icy cavern were you fought your first Gigafraug.
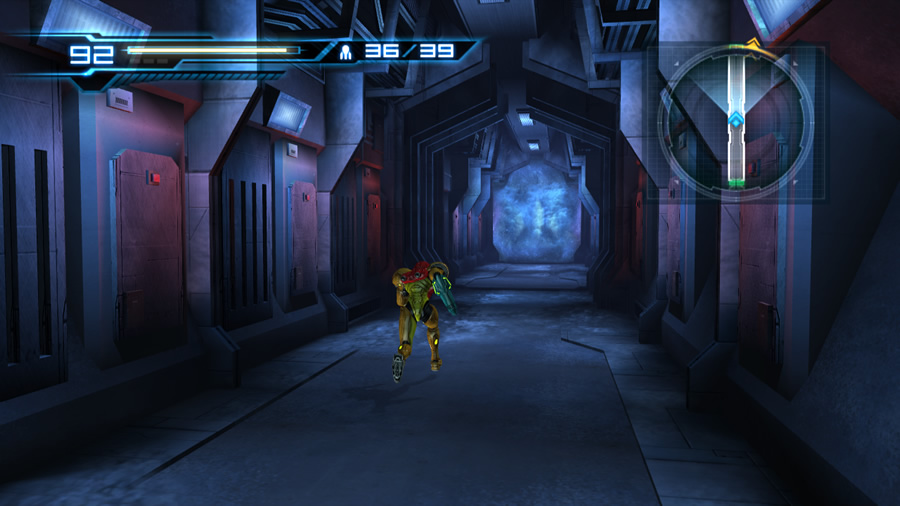
Exit the Navigation Booth and travel south through a thoroughly-frozen corridor. Himellas and Snomers like to gang up on Samus here, so feel free to clear them out (don't lose any health on Hard mode at this point). Beyond lies a less-frozen corridor, devoid of any activity. Step forward to trigger a short cutscene, showing Samus discovering a lifeless and frozen Gigafraug. She thinks that a Metroid is the likely culprit behind this Gigafraug's demise - can it be true?
Once you regain control, take a look at an open tunnel higher up on the wall to the left of the Gigafraug's remains. A multi-lock blast shield covers a door at the far end - veterans of Metroid Prime 2 and 3 will recognise this as a Seeker Missile blast shield. Leave it for now and travel west, past the Gigafraug. Don't forget to find Missile Tank S2.06 hiding behind one of the exhaust fans gushing cold air into the room.
Step down to the far end of the chamber to find another short corridor, housing an exit. Walk through and travel around a deserted curving corridor. Beyond here lies an elongated rectangular chamber. Two Snomers poke around up ahead, and in the far distance you might be able to see a pair of fans spewing cold air into the room. Unfortunately, a Gigafraug will quickly reveal itself at the far end of the chamber and immediately barge towards Samus.
Deal with the Snomers before the brute arrives. There's also a Fly Pod nest hidden behind one of the fans down the far end. No doubt a few Himellas will emerge, firing their annoying ice projectiles right at Samus. These projectiles will pester you right in the middle of dealing with the Gigafraug, so concentrate on Sensemoving the ice shards, and focus on the Gigafraug first. This is definitely a tricky area on Hard mode - don't hesitate to retreat next door and use Concentration to restore critically-low health.
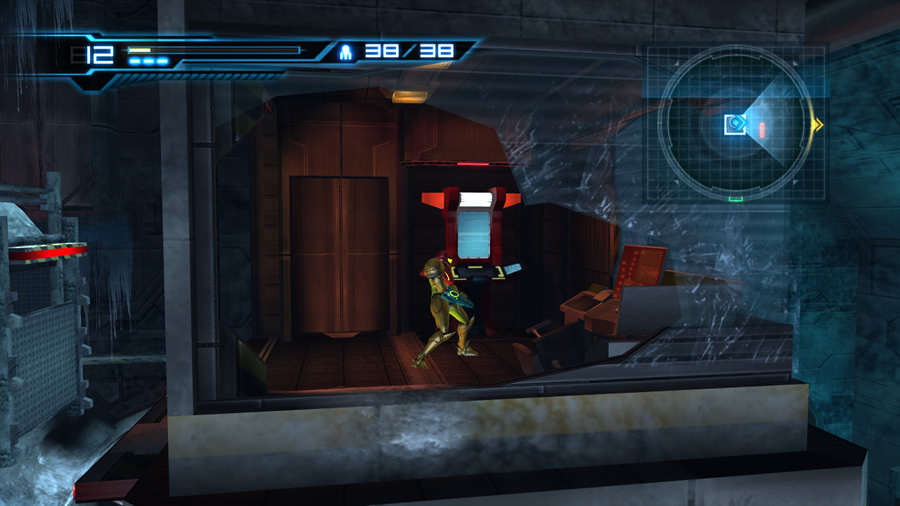
Climb up to this terminal to unlock the exit.
Once the Gigafraug is out, clear any airborne Himellas and run down to the Fly Pod. Enter first-person view and use the Charge Beam to disable the fan on the left. Quickly send three Missiles into the Fly Pod behind the fan to clear the area. Now we can take a look around.
The exit of this chamber near the exhaust fans is locked and glowing orange. There's a small control room directly above the two fans - the control terminal for the door is housed up there. Can you see a glowing metal railing running alongside the southern wall of this area?
A few icy obstructions have grown along the railing. Clear them out with a Missile each, and travel back to the entrance of the region (you might also notice a Power Bomb blast shield pod on the southern wall too...). Backtrack to the entrance of the chamber to find a cargo wall runner awaiting at the far end of the railing. Use a Missile to clear the snow and ice on it before jumping aboard.
The transport will take Samus along the wall, conveniently right up to the cosy control room above the exhaust fans. Leap off at the end of the trip, then activate the terminal inside to unlock the exit. Before climbing down, you might see a chunky ice stalactite hanging from a pipe, right outside the control room's shattered window. If you shoot the stalactite down with a Missile, a hole in a pipe is revealed above. We'll check this out later, once the Speed Booster is available.
Step through the freshly-unlocked door to discover another pretty ice cavern. This one is quite roomy, and home to a quaint little Skultera-filled lake. A tall metallic shaft stands near Samus' position - use that to climb back up to the door if need be. Leap down to the snowy base of the cavern and get ready for packs of Snomers emerging from the ground.
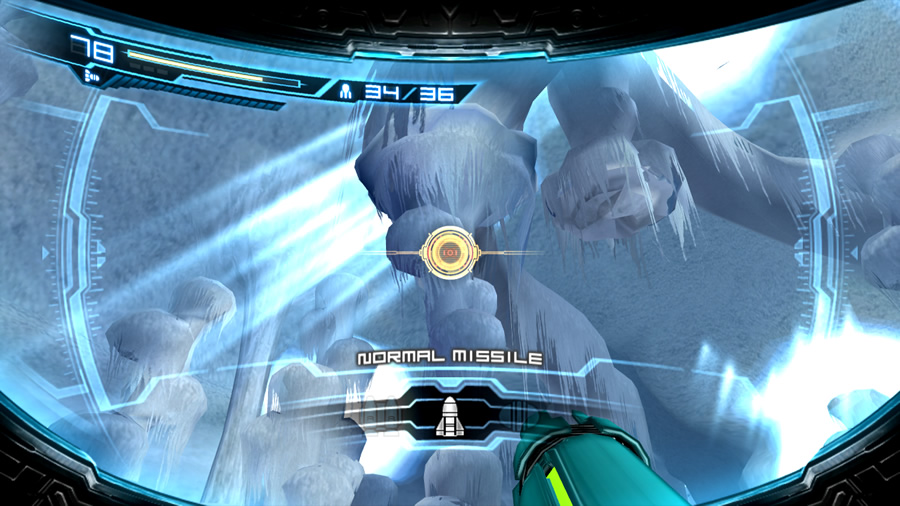
Step towards the little lake and climb up the terrain around it. Once at the top, you might notice that a narrow stream of water cascades down into the lake, originating from a gaping hole in the icy wall - how nice. Continue your climb up the terrain to eventually discover a blocked path. The thickest ice pillar you'll see in the Bottle Ship is obstructing the way forward.
This big guy needs to go, so enter first-person view and target the base of the pillar. Release a Missile into it to expose a small hole in the pillar, just big enough for the Morph Ball to fit. Enter Morph Ball mode and lay a bomb inside the hole to send the pillar crashing to the snowy floor below. With your path now open, proceed onward up the terrain. Try not to step on the pesky Snomers along the way.
That massive ice pillar is blocking Samus' path.
Watch out for two pairs of Joulions among the Snomers - don't shoot them or they'll explode and harm Samus in the close confines of the area. Jump and Sensemove through the Joulions to the exit up ahead.
Inside is the Water Tank, a large metallic chamber almost completely filled with water. The reservoir is home to a school of Skulteras, and provides no ramp or bridge to the far side of the room. So let's go for a swim.
Before leaping in, try to pick off as many Skultera as possible from dry ground. Leap in and fry the remaining Skulteras once at the bottom (Sensemove if any swim too close). There's a set of platforms on either side of the chamber to allow Samus to climb up either side, but with all this water (and no Gravity Suit), she can't climb up at the moment. So let's do something about that.
Look for a cracked and damaged hatch on the southern wall of the area. Enter first-person view and launch a Missile at it to damage the hatch further, revealing a small hole in the centre. Enter Morph Ball mode and jump inside the damaged hatch. Lay a bomb to destroy the hatch completely. This action creates a swirling vortex as the water - and Samus - are sucked out of the Water Tank and through a pipe, straight back into the previous cavern.
Most of the cavern is now filled with water, so you'll need to climb out of the enlarged lake and backtrack around to the Water Tank again. Travel towards the tall metal shaft near the entrance of the cavern. Take care along the way - a school of Skultera is likely enjoying their larger habitat. Climb up the metal shaft by using the red bars as hand-holds.
Remember that enormous icy pillar you knocked over recently? It's now conveniently floating on the surface of the water, providing a perfect stepping stone. Exit the lake and use the floating pillar to reach solid ground. Travel up to the Water Tank from here (Snomers still emerge from the snow, but the Joulions have mysteriously disappeared).
Check out your handiwork in the Water Tank - most of the water is now drained. Only a shallow puddle remains at the base of the tank. Climb down into the empty tank for a nasty surprise - two Kyratians emerge from literally thin air and assault Samus. One Kyratian will immediately try to leap at Samus - Sensemove to avoid the attack. Don't be deceived by the Kyratians - just because you can't see the exits up above doesn't mean that the doors are locked. Sure enough, if you climb back up either side of the chamber, both doors are unlocked. So only fight the Kyratians if you feel like a challenge.
Either way, climb up the right side of the Water Tank and be sure to look for Missile Tank S2.07 hiding inside the wall. Step through the exit and follow the next curving corridor to arrive in a very long hallway stretching far into the distance. If you check your map, you'll see that this corridor connects up to the large L-shaped region near the entrance of Sector 2.
No choice here - Adam must authorise the Speed Booster.
Travel down the corridor as far as you can go. A large icy obstruction tightly blocks the corridor - target it in first-person view to reveal that only the Speed Booster can break through. Well well, will Adam yield and give us access to it? Run back to the entrance of the corridor to find out. Sure enough, Adam recommends the use of the Speed Booster and gives Samus access to use it.
Authorisation of the Speed Booster will also grant use of Shinespark techniques, allowing Samus to leap insane distances at high velocity. Check the techniques guide for more details about the art of Shinesparking. We'll use the Speed Booster right away to clear the obstructions and find an exit. Start your run from the locked door and travel towards the icy obstruction. The Speed Booster should activate - keep running as Samus breaks through.
The Speed Booster will allow Samus to run up a steep slope beyond - keep going and smash through more obstructions at the top. As soon as the obstructions are broken at the top, use the Shinespark to leap backwards, right over to Missile Tank S2.08 hidden high above the slope. If you miss, feel free to slide down the slope and try again (it might be easier to time your Shinespark with all the obstructions gone).
With this latest Missile secured, activate the Speed Booster and run up the slope again. Keep running through the exit and into the next chamber, breaking through more icy obstructions. We're now back in the large L-shaped cavern at the start of the sector - keep running onward and break through the final icy obstruction on the far wall. Beyond is a cosy alcove where your first E-Recovery Tank, S2.01 resides. Each of these handy devices allows the Concentration technique to restore an extra Energy Tank.
Now that you have the Speed Booster, you can cross the broken bridge in the cavern where the first Gigafraug was battled. If you're low on health (likely on Hard mode), feel free to backtrack to the Navigation Booth at Sector 2's entrance and recover health.
Travel to the Gigafraug's icy cavern, but take extreme care in the Fumbleye's watery chamber (it's the giant eye-tentacle creature hanging from the ceiling). This time the beast is wide-awake and ready to attack Samus. Check the mini-bosses guide for details about what to expect. But keep in mind that you can't harm this thing without Super Missiles.
Unfortunately, all you can do is try to avoid it and pass through unscathed. Dodging its gross eyeball slime is easy enough, but the barbed tentacle is another matter. If you run around the platforms surrounding the chamber, the Fumbleye will try to ensnare Samus. It'll be quite difficult to time a Sensemove just as the tentacle whips at her.
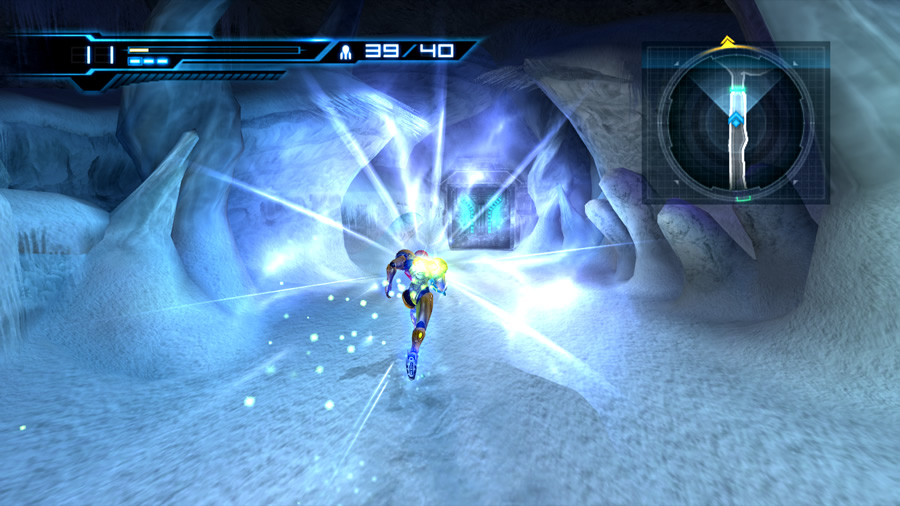
There she goes! The Speed Booster makes its 3D debut.
If you feel like sprinting on foot, start your run as the Fumbleye begins ejecting eyeball slime. That way you might be able to get a good head-start by the time the creature finishes. It'll then try to face Samus before using the tentacle, giving you enough time to outrun it. Otherwise, listen closely and tap the D-Pad if you hear the creature emit a short moan/grumble - that precedes the lightning-fast whip of the tentacle. This will be tricky on Hard mode - retreat and use Concentration if your health falls too low.
But to make your life easier, try using the Morph Ball. Stand still at the door and activate the Morph Ball. Listen closely for the Fumbleye's eyeball slime attack. Firstly, the Fumbleye will grumble, then the squelchy sound of lauching eyeball slime will immediately follow. As soon as you hear that, roll forward and belt around the platform. The Fumbleye should still be winding down its eyeball slime attack, so your speed should outrun it before the tentacle whips out.
Escape the chamber and move onward through the next long corridor. Climb up the terrain and clear out two obstructing icy stalagmites (if you hadn't dismantled them earlier). This corridor needs to be an open runway to provide enough distance for the Speed Booster's charge.
Once you're ready, run for the door and build up the Speed Booster's charge. Once it activates, keep running into the icy cavern beyond, right to the edge of the broken bridge (which is conveniently lined up with the door). If you run to the edge, Samus luckily won't fall off. Calmly perform a Shinespark leap from here to fly across the chasm and land on the other side.
That was fun - now you can enter the Navigation Booth currently marked on the map. Don't forget to locate Energy Tank S2.01 hidden down a hole on the right (use the Morph Ball Launcher in the tunnel to climb back up again). Step inside the Navigation Booth and save your game to reveal the next part of your journey.