


Data
Guides and strategies
- Techniques Guide
- Power-up locations
- Bosses Guide
- Mini-bosses Guide
- Search View Guide
- Obstacles Guide
- Walkthrough
- Game endings
- Secrets and tips
- Game maps
Media
Chapter 6: Deadly Hazards
That damaged wall looks rather convenient.
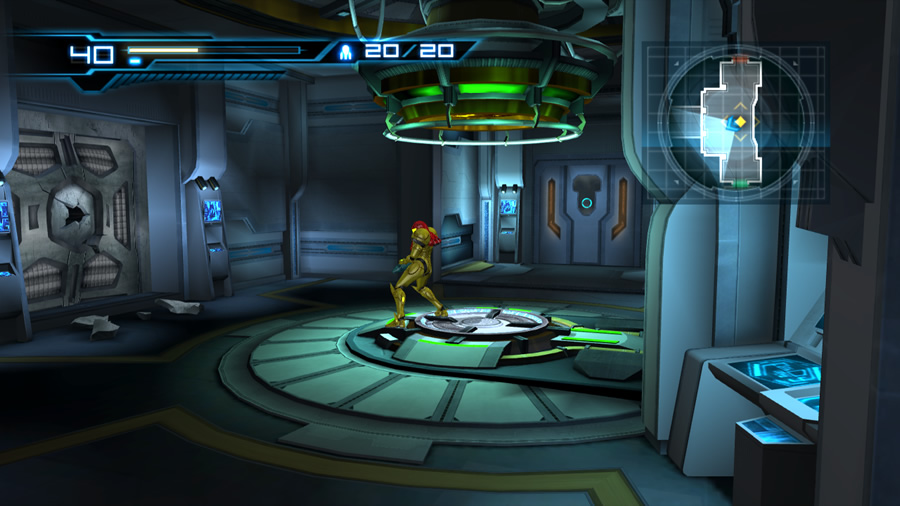
This time the Navigation Booth's exit ahead is glowing orange and won't unlock, so we'll need to do some extra work. This Navigation Booth bears moodier lighting than most - take a look at the wall across from the save station for evidence of damage. The wall panel is clearly cracked - send a Missile into it to break open a small hole. It's just the right size for the Morph Ball, so climb on through.
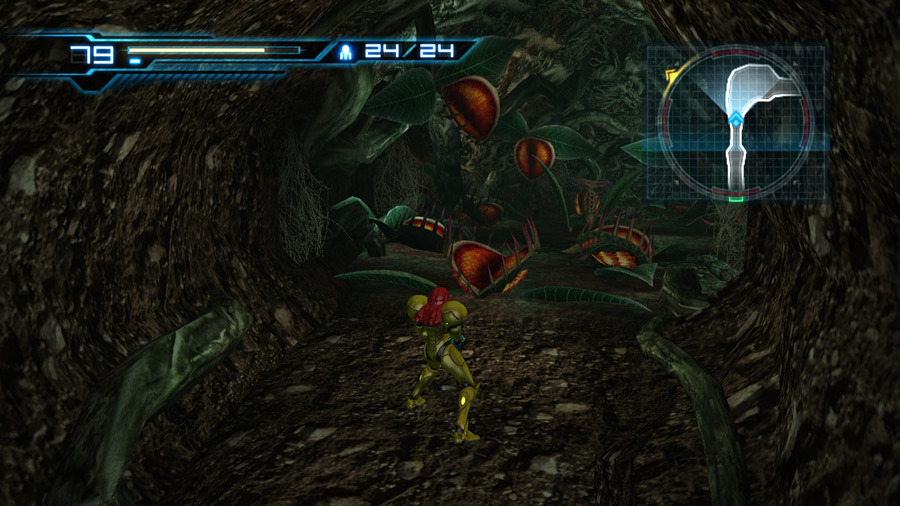
The corridor beyond descends steeply down a flight of stairs and out-of-sight. But what are those crashing and growling sounds echoing around the area? Move down the stairwell and around the corner to locate another wildlife enclosure, but this one's a little different.
Two open-air environments are visible from the long corridor, and the swamp-like regions are home to massive tree-like beasts. Each of these specimens is a Groganch - a towering tree-like monster that likes to periodically launch purple orbs from its back.
These two inhabitants can't see Samus and can't be interacted with, so move on from this zoo when you're ready. Climb down the next stairwell and exit the corridor. Beyond here lies an almost-civilized location. Look around the chamber; among the globs of saliva are cushioned chairs and glass tables - it looks like this place was once some sort of lounge for the human scientists. Just like many lounge rooms on Earth, there's an adjacent rest room. Step inside the ladies' rest room (once again you can't enter the men's) and walk up to the last cubicle. Samus will open it automatically, revealing the glowing yellow Accel Charge S1.01 hidden inside.
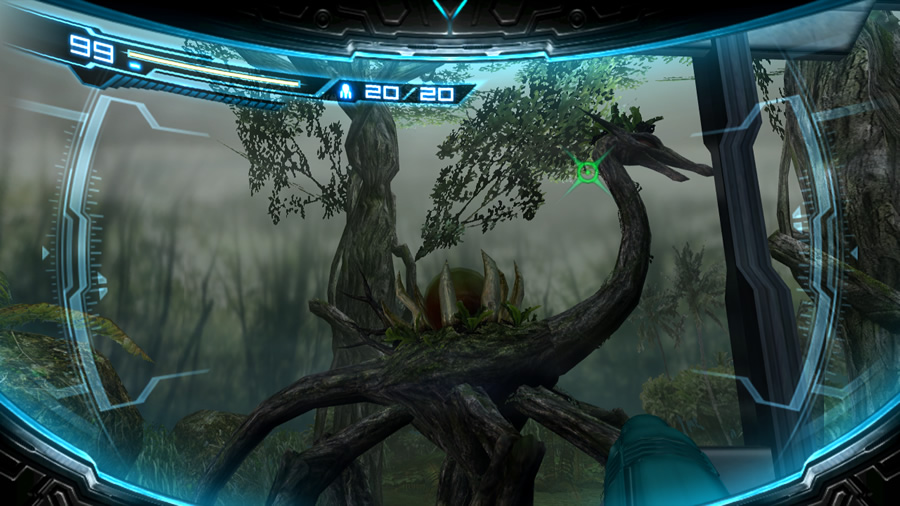
This mighty specimen is safely confined to its enclosure.
These items will decrease the time it takes for the Charge Beam's charge gauge to fill up, so they're always worth looking for. Exit the rest room and depart the lounge via the southern door. Don't step into the following corridor immediately - it's packed full of floating Bull. Blast them from here to avoid taking any damage (or just roll underneath them with the Morph Ball). Once the corridor's clear, cross through to the chamber beyond.
The next chamber is filled with meandering Geemers. As you step inside you might hear a strange chippering (or chirping) sound. But it's not coming from the Geemers... You might notice that there's an open hatch in the ceiling of this chamber. Without the Speed Booster there's no chance of Shinesparking up there yet. Instead, there's a door nearby - clear any Geemers crawling on it to open it up. Step inside and take a close look at your surroundings.
This chamber is a fairly narrow shaft stretching up high above. Broken floor panels, exposed wiring and a steady stream of dust falling from above might give you an idea of where you are. Welcome to the Infamous Elevator Shaft - you'll find out why it bears that name soon. There's nothing to do at the base of the shaft and there's no control terminal to summon the elevator itself, so let's start climbing upward. Jump and grab hold of the orange-and-yellow ledges lining the shaft to climb up. Watch out for any wandering Geemers as you ascend.
Eventually you'll pass by a small alcove set in the shaft's wall. Keep ascending the shaft and look for a second alcove higher up. Climb into the alcove and enter first-person view. Look straight up at the top of the shaft - here you'll be staring at the bottom of the elevator platform above. But if Samus is below the elevator, how will she get up there? You might also notice a damaged wall panel just below the elevator platform, but targeting it will reveal that only a Super Missile can damage it.
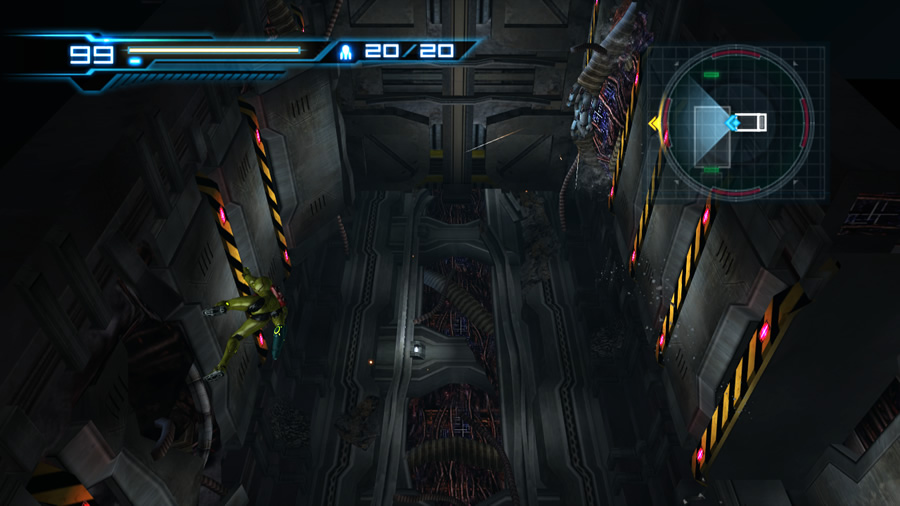
Climbing up the damaged elevator shaft.
Return to normal view and look closely at the wall directly above the alcove. There's another damaged wall panel immediately under the platform, complete with sparking circuits. This one might work better. Jump out and climb up the opposite wall so you've got a clear shot at the sparking wall panel. Now comes the tricky part. The only way to remove that elevator platform above is with physical force, but as a general rule it's never a good idea to be directly underneath an elevator platform when it falls.
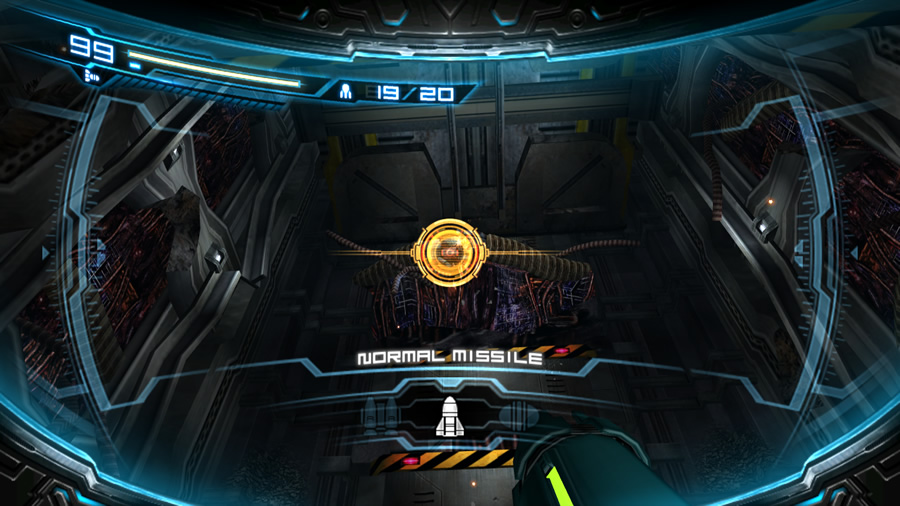
There's nothing else for it, so enter first-person view (you can still do so while hanging from the ledge) and target the sparking wall panel. This one is weak against Missiles, so launch a single projectile to disrupt it and begin to dislodge the elevator platform above. You've now got around 10 seconds to quickly get back down to the small alcove before that elevator comes crashing down. Miss it and it's an instant Game Over. To add to your troubles however, a pesky Ghalmanian has arrived and taken up residence further down the shaft.
Whatever you do - don't fall down and don't get caught by the Ghalmanian's tail, otherwise you're both likely to fall victim to the elevator. Instead, as soon as you regain control, leap down to the small alcove on the right wall and climb safely inside. Enter first-person view and look up at the damaged wall panel that earlier needed a Super Missile to break.
Now with the crushing weight of the elevator upon it, the panel only requires a Missile to break. So strike it with a Missile from the safety of the alcove to send the elevator plummeting down, dealing with the Ghalmanian as a bonus. You can also wait in the alcove for the elevator to fall on its own, but don't wait in case the Ghalmanian tries to attack. If you happen to fall down, quickly climb back up to one of the alcoves before the elevator falls.
Phew, with the Infamous Elevator Shaft conquered you can now climb to the very top (check out the flaming wreckage of the elevator platform far below...). Be sure to grab Missile Tank S1.04 before moving onward. Climb out of the elevator shaft and exit the chamber before the Geemers get too rowdy. The empty chamber beyond hides two items, for now you can find Missile Tank S1.05 hidden within the right wall.
Knock down the obstruction only from the safety of an alcove.
Exit this green-lit chamber to find yourself at a familiar location. Two parallel walls lined with computer terminals border an airy chamber. A generous observation window on the far side of the chamber looks out onto the desert environment we explored earlier (remember that weird floating rectangle in the sky you might have noticed back when the hologram generator was still active? It turns out to be this large observation window). Feel free to enjoy the view, then we need to find the way forward.
This chamber at first appears to be a dead-end, but take a closer look at a yellow-glowing grate beside the window. Enter first-person view, target the grate and release a Missile (or plant a Morph Ball bomb) to dismantle the object and reveal a narrow ventilation shaft inside. Activate the Morph Ball and roll inside to fall down a long pipe. At the base you'll land atop a small round device set in the ground, but without power it won't be helping out any time soon.
Keep rolling along the ventilation tunnel - along the way the path will be obstructed by a single concrete block. Dismantle it with a bomb, then clear out two more blocks as they fall from above. Move forward and turn the corner to locate another concrete block obstruction. Watch out with this one - the third block to fall will look a lot like a Geemer, so leave a bomb for it and roll back left to avoid harm.
Move onward and take a look at the wall of the tunnel. Small windows showing the view outside reveal that we're travelling along the western wall of the desert environment. Keep a close eye out for another concrete block set in the wall further ahead - bombing this block reveals a tunnel leading out to a high rocky cliff in the desert region. Out there you'll find two hovering Grapple Points leading over to an item in the far distance, but for now we can't reach it.
Take note of the item's location and go back inside the ventilation tunnel. Keep rolling down the sloping incline and get ready to jump over a hole at the base to safely reach Missile Tank S1.06. Fall down the hole and continue rolling right. Eventually the tunnel will end and Samus will be deposited into the Scrap Block - a large chamber filled with debris and a swarm of Wavers.
Feel free to clear the air of Wavers first, then dismantle the debris on the left side of the large exit up ahead (use Missiles). The corner behind the debris reveals a narrow hidden tunnel entrance - roll through and up the following slope to discover Missile Tank S1.07 hidden inside a caged alcove (bomb your way inside).
Be ready to Sensemove when approaching an inanimate Gripper.
With your latest Missile Tank secured, roll back down the slope to the Scrap Block, then exit the chamber and climb up the eastern-facing stairwell. Step through the door to find the chamber where the previous Missile Tank's alcove is visible. By now you'll have surely noticed the constant tremors rocking this region - and that enormous breach in the wall ahead was probably caused by the same source...
Climb through the ruined wall to find yourself inside an earthy tunnel lined with plant roots (are we really still on board a starship in outer space?). Use Missiles to clear the tunnel's obstruction to reveal a narrow opening at the base of a dirt wall. Roll through to find a clearer and longer dirt tunnel stretching into the far distance.
Step trough this open tunnel with care; don't walk into the two small indentations in the ground or a pesky Gripper will emerge and take a bite at Samus. Move down towards the dirt wall at the far end of the chamber, but approach it with care. Are you wondering what's causing the constant tremors here? If so, don't have the volume turned up.
Step towards the wall and... AHHH! Just as you're about to reach the third indentation in the ground (set right in front of the wall), a sudden spike in the music accompanies an enormous worm-like beast as it bursts through the wall, bearing down on Samus' position. Madly tap the D-Pad to Sensemove just at the right time to keep Samus safe from the overgrown predator.
Yikes, that was unexpected... Well, the tunnel wall is now open ahead, so let's keep moving. Step through to a new cavern - one filled with inanimate (and animate) Venus fly-trap specimens. The ones on the ground need to be dealt with - these Gripper will spring to life when Samus walks too close. There's a few moving ones deeper in the chamber - target and fire Missiles at them first. Wake the stationary ones up and perform a quick Sensemove backwards to avoid their jaws. Quickly enter first-person view and let loose some Missiles (remember that you can still Sensemove while in first-person view by waving the pointer to either side of the screen at the right time).
These Gripper like to burrow underground and try to ambush Samus from below, so keep moving and get ready to jump or Sensemove as they emerge from the ground. There's quite a few Gripper to deal with here. Just take your time, keep your distance and shoot anything that moves. Once all targets are gone, use a Missile to open the thick obstruction nearby. Travel south and cross the long dirt tunnel; use another Missile at the far end to open the earthy dead-end.
If Samus' visor outline turns green, use a Sensemove.
This tunnel opens up in two directions - one directly ahead and one straight up. We'll be exploring the tall shaft above later on, so for now keep moving south. Use another Missile (or Morph Ball bomb) to uncover a metal pipe in a narrow dead-end. Roll through the damaged pipe section and follow the tunnel. You'll pass by another round powered-down device along the way. Keep going to eventually discover the Subterranean Control Room - is this where we'll find the controls to restore power to the Navigation Booth's door miles away?
The vast empty chamber won't be empty for long. Step towards the exit on the southern wall to find it promptly locked tight. Somehow, two Ghalmanians invade and tackle Samus. Be ready to Sensemove the one standing right in front of the sealed door. Quickly take them both out with the Missile-then-Lethal Strike combo (don't waste any time on Hard mode).
With both hostiles cleared, the door will unlock and allow passage. You might also notice another one of those Power Bomb blast shield pods in here too, hmm... There seems to be quite a few of these... Exit the chamber and save your game in the Navigation Booth.
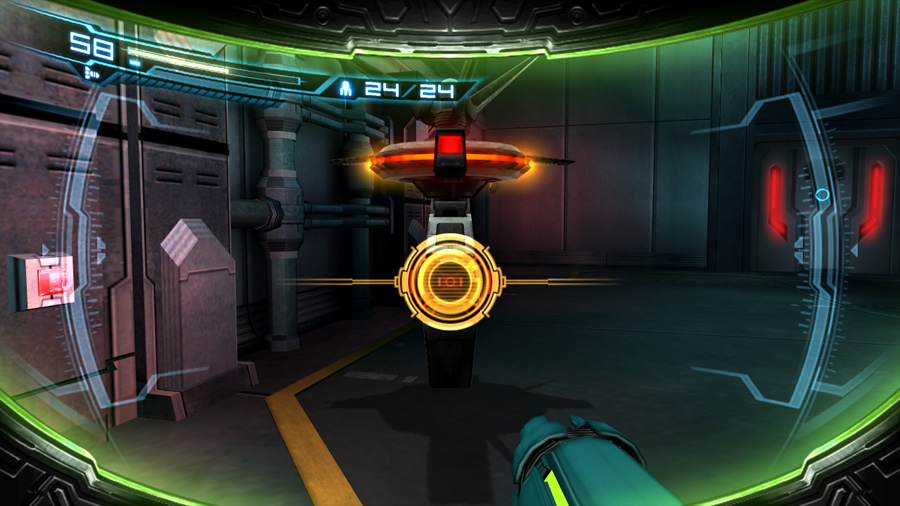
Leave the chamber to find a sealed dead-end room housing Samus' next challenge. A hatch in the ceiling promptly retracts, depositing two large robotic drones into the chamber. These sentries are FG-1000 units, and can be troublesome for newcomers. Check the mini-bosses guide if you need help dealing with these hostiles (all three of them). You'll get plenty of Sensemove practice before these units are dismantled. Once the final unit explodes, it'll drop a small, intricate glowing orb. Scanning it in first-person view doesn't reveal anything further (just a "Details Unknown") message. Let's just pick it up anyway. After a moment the game will reveal this item as the Diffusion Beam!

The Diffusion Beam works great against airborne swarms of enemies.
This handy item spreads out the Charge Beam's splash damage, and luckily you'll have a chance to try it out straight away. The southern wall of the chamber will open, revealing a large computer terminal flanked by two Fly Pods and a swarm of hungry Reo.
Try out the Diffusion Beam to clear the flying swarms before tackling the Fly Pods (it works really well). Once the chamber is clear, the terminal comes to life and awaits input. Activate the terminal to finally achieve the goal of this crazy excursion - the monitor above will show the sealed orange door in the earlier Navigation Booth unlocking; power has been restored to that chamber.
So now we need to backtrack and return there to continue our recon of Sector 1. Head back to the Subterranean Control Room and save your game on the way. Walk towards the small hatch in the corner of the chamber, only to find it locked tight.
A familiar face quickly shows itself - the large worm-like beast from earlier busts through a nearby wall. A second later, another similar creature emerges. This pair of Botwoon's cousins are known as Fune and Namihe. Both must be defeated before you can leave, so refer to the bosses guide if you need help.