


Data
Guides and strategies
- Techniques Guide
- Power-up locations
- Bosses Guide
- Mini-bosses Guide
- Search View Guide
- Obstacles Guide
- Walkthrough
- Game endings
- Secrets and tips
- Game maps
Media
Chapter 10: Running the Gauntlet

Samus is about to face several deadly scenarios in Sector 3.
As Samus steps into Sector 3, Adam reminds us that further equipment and weapon access will be granted when the need arises. Once you regain control, take note of the Power Bomb blast shield pod on the left and travel right. Exit the corridor to arrive in a veritable outdoor Norfair - Samus is now standing in a clear glass tube overlooking an enormous lava lake stretching far into the horizon. A massive erupting volcano fills the northern sky and thick red clouds swirl in every direction.
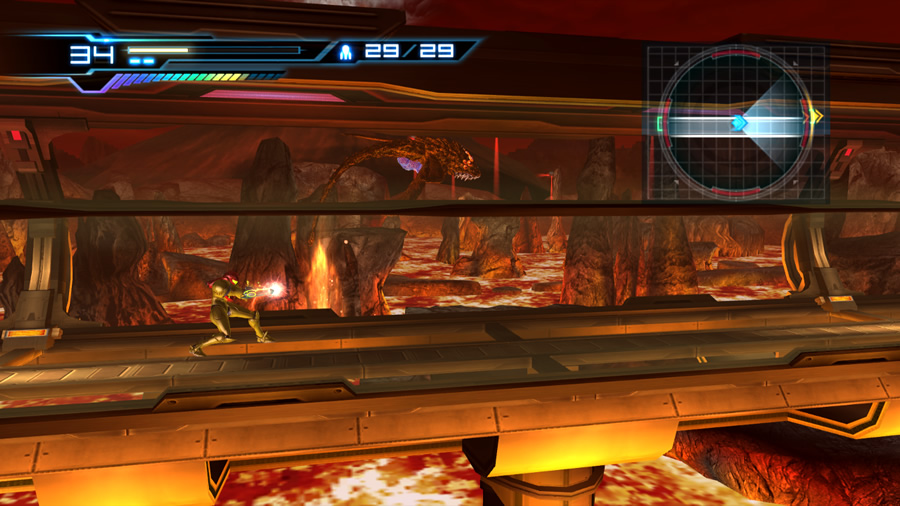
For now we'll keep travelling along the glass tube and see where it leads. Watch out for Skree hanging from the ceiling ahead - either knock them down from afar or Sensemove through their positions. Be very careful as you enter the enclosed corridor ahead - there's an obnoxious Heat Bull floating around. These annoying snobs like to suddenly charge at Samus even if you don't attack them, so keep your distance and open up with a Missile or Charge Beam shots to take them from afar. Sensemove if the jerk flies toward you, but keep your distance before firing back - they explode violently when fired upon.
Step through the corridor to the next long glass tube. Somewhat-friendly Mellas hover outside this tube and thankfully won't attack Samus. Keep walking and you'll see an enormous lava-fish leap out of the lake in the distance. Whoa... That beast is called Vorash, and is definitely not friendly.
Continue ahead to be greeted by three Mellas inside the tube. These ones like to shoot fire at Samus and swoop at her, so either Sensemove past them or shoot all three down. Proceed onward beyond the Mellas. Oddly, the camera view slowly pans out and further away from the glass tube in the next segment. Why is it doing that?
Get ready - the lava-fish Vorash will suddenly leap up from the lava below, crashing through the glass tube in an attempt to gobble Samus right there and then. If you fail to Sensemove at the right moment it's an instant Game Over. To time your Sensemove, release the D-Pad as soon as Vorash appears (the game slightly slows down to give you a better chance). Tap the D-Pad rapidly (don't hold it down) to successfully perform a Sensemove at the right moment.
This is a very easy trap to fall for when you're not expecting it. You'll only have literally about a second to Sensemove to safety. Don't feel too bad if you fail, as you'll be sent back to the entrance of Sector 3 which luckily isn't too far away.
Once Samus is safe and Vorash dives back into its lava home, you might see that a Grapple Point has now appeared where the glass tube was once whole. The Grapple Beam will allow you to pass back-and-forth through here, so without it all we can do is move onward.
Step through the door at the end of the glass tube to locate a tall darkened chamber. Before climbing down the stairwell before you, enter first-person view and a send a Missile at the annoying Heat Bull down below. Climb down the stairs and watch out for another Heat Bull beyond the lower set of stairs.
Welcome to the fiery heart of the Bottle Ship.
Here you'll find a door leading into a Navigation Booth. But before going inside, can you see three small glowing fireflies in a small alcove? Climb up in there and follow a hidden tunnel to find Energy Part S3.01. The fireflies generally point to hidden items, so keep an eye out for them throughout Sector 3.
Step inside the Navigation Booth and save your game to reveal more of the region's map. This Navigation Booth is a dead-end, so backtrack and climb down the stairwell to the lower level of the adjacent chamber. Now we arrive at one of the game's most controversial scenes.
In Super Metroid, players needed to find the Varia Suit before entering Norfair's super-heated areas. Even though Samus technically already has the Varia Suit now, she won't activate it until Adam gives her permission. You're about to step out into the super-heated lava lake where the very air will slowly drain Samus' health. But Adam won't grant access to the Varia Suit until later, forcing players to endure the lava lake's heat and suffer continuous damage.
Debates could rage forever on why Nintendo decided to make the game like this - I guess they just wanted to give us a challenge. But then why does Adam watch as Samus suffers in the heat and denies her the use of the Varia Suit? Well, he either fell asleep at his post, or there's another possible explanation...
Remember how you passed by a rest room in the Main Sector, some distance from the main control room where Adam sits? Let's just say that the Federation power suit Adam wears might not have waste-management features like a modern day space suit would. So if nature calls, Adam would need to leave the control room and backtrack down to the rest room. If he went now, Samus will have finished crossing the lava lake by the time he returns. Not wanting to let anyone know that a well-respected military leader needed to use the bathroom in the middle of an active operation (with an already confirmed casualty), Adam just keeps it to himself...
Anyway, it's just a plot hole so let's deal with it and move on. If you're playing on Hard mode, be sure to have full health before stepping into the oven. Once you're ready, run at the door and dash onto the first rocky island in the enormous lava lake. Samus will begin to suffer damage from the intense heat, and you'll barely have enough time to escape through this area on Hard mode.

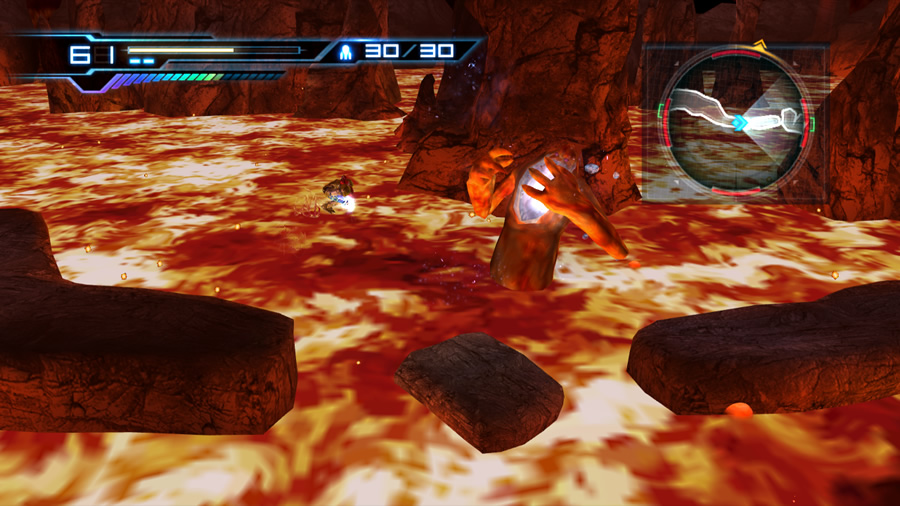
This enemy encounter is pure chaos - use the Sensemove to keep Samus safe.
Leap across the first few islands without incident. But don't expect this to be an easy run. Soon into this heated gauntlet, Vorash will re-emerge from the lava and pester Samus from either side of the islands. Keep moving onward and use a Sensemove every time Vorash attacks (the game slows down slightly each time Vorash emerges from the lava - remember to release the D-Pad and press it again to perform the Sensemove).
If Vorash scores a hit you'll be knocked into the lava, and on Hard mode you can't afford to have that happen at all. If you do ever fall into lava, you'll have a difficult time jumping out again - just keep pressing jump and Samus will eventually climb out. During Vorash's attacks, some of your Sensemoves will send Samus leaping across to the next island - just relax and keep moving forward.
Vorash is utterly relentless in bombarding Samus from either side, and can prove tricky when attacking around areas where you need to jump. Practice your evasion techniques - Vorash attacks from the same locations every time so don't worry too much if you need to try this run a few times. Eventually with one final Sensemove, Samus will automatically make a run for the exit on the far side of the lava lake.
However, don't rush into the chamber if you're playing on Hard mode. Check your map to see how far away the door is - after you pass over a group of small island stepping-stones (Vorash attacks once in this area), climb up to solid ground and wait there. Vorash relents for a moment and doesn't appear for a short while, it'll pop up one more time before Samus automatically escapes the lava lake.
Stay where you are and wait for your health to dip below 25 units. Once it turns red, immediately run for the door and Sensemove Vorash's final attack to automatically send Samus running inside. As soon as you regain control, use Concentration to fully restore your one Energy Tank (you'll need it for the next enemy encounter).
Phew, you're now safe inside a concealed chamber. Not for long though, as you'll discover a Fly Pod in the corner (which is literally set on fire). Walk towards it and a Cyborg Zebesian will suddenly leap down from the ceiling. More of his buddies will arrive, and the narrow confines of the chamber will soon be filled with hostile energy blasts and missiles. Stay in one corner to avoid becoming surrounded, and try to use Overblasts as much as possible against the Zebesians.
The Ice Beam works well against Sector 3's denizens.
Eventually the Fly Pod's resident Mellas will emerge and join the Zebesians. There's barely any room now to avoid enemy attacks, so break out your Sensemoves and use quick Charge Beam hits whenever safe to do so. Eventually Adam will chime in and distract you from the action - don't worry about what he's saying, just keep Sensemoving to avoid enemy attacks. Soon enough, Samus will stand still as her Ice Beam activates - Adam has now given authorisation to use it (he must have just made it back from the rest room).
The Ice Beam works wonders against the Mellas and the inexplicably fiery Fly Pod. Knock them all down and use repeated Ice Beam blasts to fell the Fly Pod; you won't need to use Missiles against it. Mop up the remaining Cyborg Zebesians to clear the area. Don't forget to search for Accel Charge S3.01 before leaving. The door leading back out to the lava lake is now locked, so we can only go forward.
Leave this chamber and carefully step through the next long corridor. Heat vents, Mellas and flightless Novas inhabit this region, so take care and feel free to try out the Ice Beam. Move onward to locate a larger chamber, also filled with flaming heat vents along the walls. Cross the dusty region and step past the heat vents, staying clear of the scorching flames. A large purple two-legged creature will promptly erupt from the ground and attack Samus on-sight. This monster is a Dessgeega, and you'll be seeing plenty of them further on. Check the mini-bosses guide for tricks to take them down safely and easily.
Once the first Dessgeega's down, keep moving forward (time your movements around the heat vents) and three more of the pests will emerge from the ground. Deal with them all to unlock the doors and allow escape. Before leaving, be sure to grab Missile Tank S3.01 hidden behind the perpetually-flame spewing vent.
WARNING! GAME-BREAKING BUG ALERT!
You may have read about the game-breaking bug in Sector 3 that unfortunately remains in the retail version of Metroid: Other M. This is the point in the game where it can all go wrong. To avoid the bug, leave this room immediately via the door near the tall cliff - do not backtrack to the chamber where you received the Ice Beam. Check out the secrets and tips section for more information.
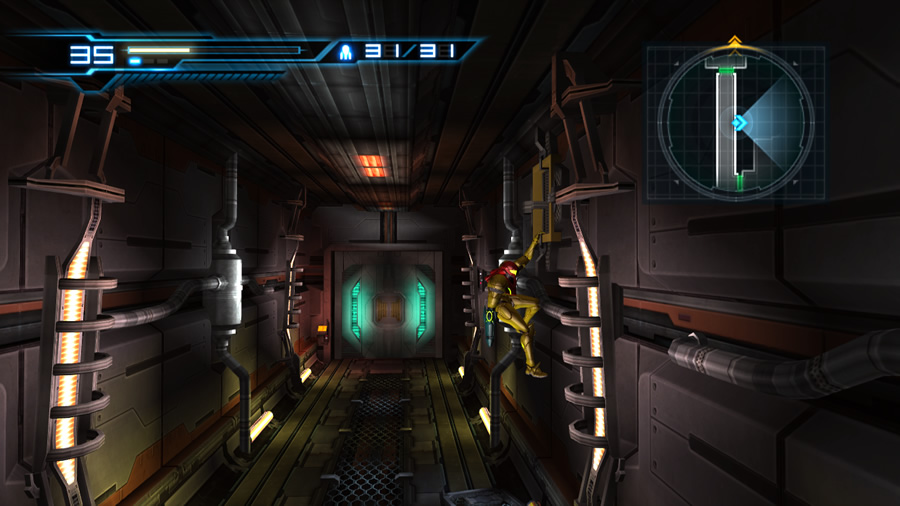
Once you've safely departed the Dessgeegas' chamber, step forward to find a tall elevator shaft. With no transport to ride, you'll be wall-jumping up this shaft. Watch out for pesky Novas inhabiting the walls; you should be able to safely wall-jump past them without making contact (but feel free to clear them off the wall and play it safe). Once at the top of the shaft, you might spot a Super Missile blast shield in the ceiling. You can't destroy it yet so let's keep moving.
Don't forget to look under the stairs for a hidden Missile Tank.
Step through the next corridor to locate another tall shaft - this one points straight down. Carefully descend the shaft, using the yellow-and-black bars to hang from. Don't go all the way to the bottom - a super-heated chamber lies below and is too hot for Samus to handle. Instead, look for a large blast shield on the right wall of the shaft. It's up near two meandering Novas.
A Sensor switch rests on the wall above the blast shield. Hang from a nearby bar and enter first-person view from there. Energize the switch to raise the blast shield partially. With just enough room for the Morph Ball to squeeze through, leap down and climb into the opening (watch out for pesky Novas). A single Nova inhabits the next short corridor - move through the exit to locate another safe Navigation Booth. Save your game here to unlock the door and reveal your next target on the map.
The next Navigation Booth lies far beyond the opposite side of the lava lake, so it looks like we'll be running the gauntlet again. Run outside and begin charging up your Charge Beam. Unfortunately, this sequence of islands leading to the far side of the lake presents a new enemy to face. Large two-armed lava-dwelling beasts inhabit this area, known as Magdollites. These monsters will test Samus as she passes through (what were those scientists thinking?).
Take care around each Magdollite, as each one will either try to swat Samus with their ridiculously long arms, or lob a huge flaming ball of rock straight at her. Both attacks can easily knock Samus into the lava lake, something you definitely want to avoid on Hard mode. Keep your beam charged and fire at each target along the way; often a fully-charged blast will freeze the Magdollite's face and prevent it from attacking.
Take special care when you reach a cliff. Climb up and run down the gradual slope. Keep an eye out for a Magdollite off in the background - freeze it now, before travelling closer. Jump across and stay on the tiny island between the two longer islands. A junior Magdollite resides up ahead (just out of view) that lobs a fireball straight at Samus. Wait here and Sensemove the fireball as it passes.
Climb in this vent to find another Missile Tank.
Leap across and give the smaller Magdollite a freezing blast to its face, then climb up the cliff behind it. On Normal mode, there's an Energy Part hidden within this rocky cliff, so if you still have plenty of health, feel free to climb down and crawl inside to find Energy Part S3.02. Otherwise you can always come back for it once the Varia Suit is up and running.
There's no more pesky Magdollites left from this point onward, so quickly dash for the door up ahead to finally leave the super-heated lava lake. However, if you're playing on Hard mode again, stand outside beside the door and allow your health to drop below 25 units. Quickly duck inside and perform a Concentration to fully restore your health (feel free to do this on Normal mode too if your health is low).
Travel through the next L-shaped corridor and deal with the colony of Novas and Mellas (don't let any grab Samus or they'll detonate). Knock down the flaming Fly Pod and try to avoid taking any damage, we've got another tricky enemy encounter right around the corner. Step through and exit the corridor to arrive at the Floor Observation Room.
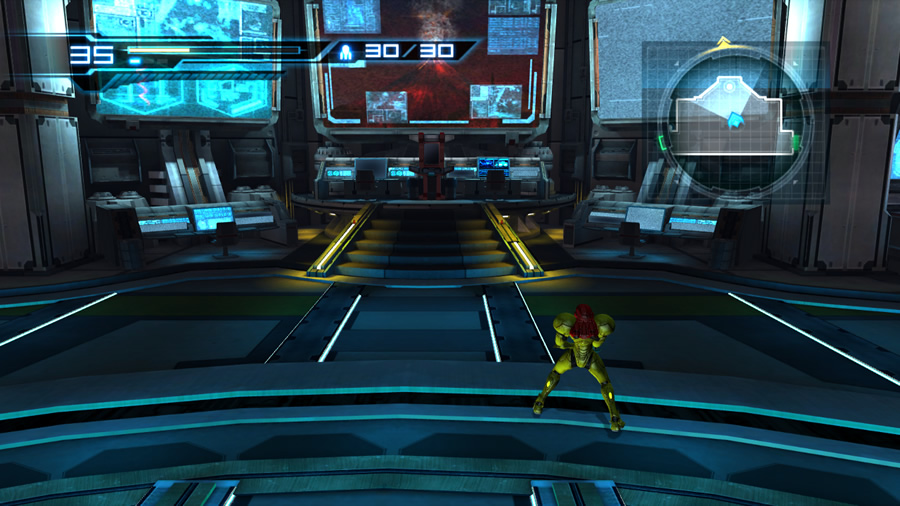
This large command chamber seems innocuous enough... There's a big control station on the southern wall, and an exit directly ahead on the far side of the chamber. But can you see something attached to the large computer monitor up on the control station? Try walking towards the exit ahead to awaken this new threat.
The creature will leap off the wall and dive directly at Samus - immediately release the D-Pad and press it rapidly to Sensemove clear of this opening attack. Otherwise it'll grab her and inflict damage you can't afford to lose. This new foe - a cross between a reptile and something amphibious - is called an Asborean. More than one will pester you on your journey ahead and each provides a difficult challenge to overcome. Check the mini-bosses guide for a lengthy analysis on what to expect and how to deal with this customer.
If you manage to use a Lethal Strike on the Asborean and pull the serpent out of its shell, quickly climb up to the computer terminal on the control station. Your foe won't be able to follow you up there, giving you an easy shot to finish it off without potential harm from its constricting self-destruct attack.
Conquering this first Asborean will unlock the doors and allow you to exit. Don't forget to look under the control station's stairwell for Missile Tank S3.02. The large computer monitor displays the still-erupting ominous volcano outside - guess were we'll be heading now?
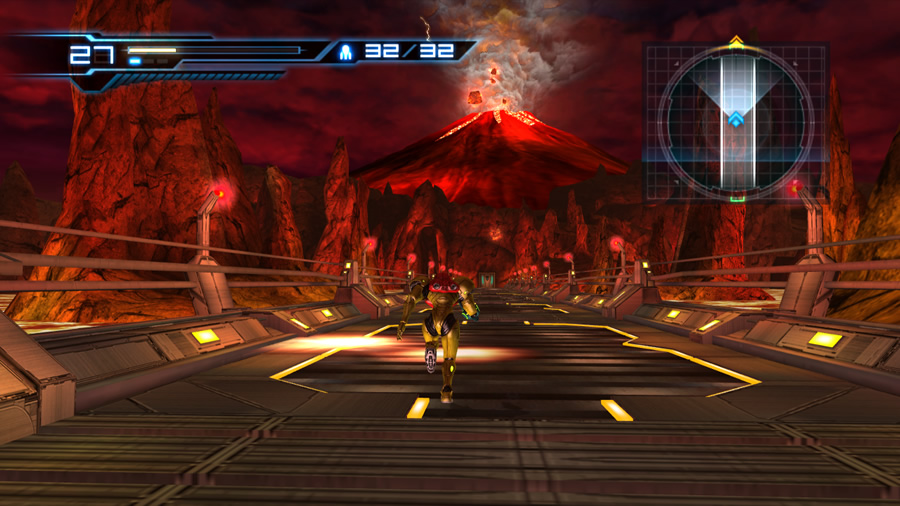
This fantastic view is interrupted by super-heated air and incoming meteors.
Depart the Floor Observation Room to find a short corridor leading south. Before leaving this new corridor, look for an open vent up on the right wall and climb inside to find Missile Tank S3.03. Come back around to this corridor again and step through the exit ahead. You're now standing at the start of an enormous outdoor walkway pointing directly towards the erupting volcano.
Unfortunately, it's another super-heated area. If your health is low, stay at the entrance and allow the heat to bring it low enough for Concentration, then duck back inside and use the technique to restore your health. Begin your sprint along the walkway, however watch out for incoming flaming meteors. Each audible eruption from the volcano delivers these flaming balls of rock directly to your position (what luck), and a Nova pops out from each impact.
Only engage the Novas if they stand in the way. Watch for glowing auras on the ground to indicate where the meteors will land. Don't bother with the Sensemove - weave around the impact zones and jump to avoid the rocks. Reach the far side of the walkway and step through the door to locate a well-placed Navigation Booth. Save your game to unlock the door and restore health. The map will reveal a large circular chamber up ahead - guess what that is? Our final run through a super-heated area will be in the heart of the volcano itself.