


Chapter 1: Planetfall

Planet Aether is clearly in a state of dimensional flux.
We begin the game with Samus entering Aether air space, only to fall victim to an electrical storm and crash landing in a rocky clearing. Don't worry too much about the ship, its handy self-repairing systems are already hard at work repairing the damage. Remember that you can always return to the gunship to save and reload your weapons.
You'll straight away notice that Samus already possess a number of her abilities like the Space Jump Boots and Charge Beam, but sadly only has five missiles up her sleeves for now. Take a quick look around the clearing before turning around and scanning your gunship for the Logbook. You'll notice in this game scannable objects glow brightly rather than emit a simple scan icon, so they're a lot easier to spot.
Scan one of the many pillars around the clearing, and don't forget the smaller pillar adorned with a purple crystal cluster hidden in an alcove. You'll figure out what to do with it later on. Scan the center of the large web-like structure barring your path at the far end of the clearing before blasting it clear. Take out the following two webs to clear a path to a powered blue door. Shoot it once to open it up and head inside.
The following tunnel is home to numerous (and harmless) plants, they don't hinder your progress at all so walk on through. Up ahead you'll find a fork in the path leading left and right. If you take the left path you'll locate a large mechanical gate adorned with a rotating violet hologram blocking the tunnel. Your Scan Visor won't be of much use here so you'll need to backtrack and head down the other tunnel. At the rear of this path you'll find a gaping hole in the ground. Walk forward and Samus will automatically take the plunge and drop through the shaft.

Samus returns to action, this time on a quest to save an entire species.
At the base you'll find yourself in a cave filled with Galactic Federation (GF) equipment. Scan everything to get an idea of what the troopers were doing around here. Scan the large units on the walls to discover the GF's pest problems, they've been trying to purge the area of small insects called Splinters. There's a few dead creatures below the units, don't worry, you'll be facing plenty of live ones soon enough. Also take note of the smaller crates in the room, they can easily be destroyed with standard fire, while the larger red ones need a Charge Beam shot or a missile to blow open.
At the far end of the cave you'll find a secured gate blocking your path. Scan the gate itself for your Logbook, then scan one of the two small locks above it. Scan the control terminal on the left to open up the locks, then destroy both to open the gate. Proceed down the slimy tunnel and past another group of dead Splinters. Scan the large wall at the far end to reveal its purpose - another security device put in place to keep the Splinter's out of the GF base. Follow the wires connected to the wall to spot the control terminal nearby, scan it to gain access.
Beyond you'll locate the first of a number of GF command stations. Completely deserted, you won't find much here except for a number of scannable terminals and a Map Station. Scan the terminals for more info on the GF trooper's movements, then step into the Map Station for a better look of the area around you. The revealed map will display a number of areas beyond your current position where the GF troops have setup shop; their ship is at the northernmost location on the map.
Blast the web covering the next door and head through. The following tunnel doesn't have the best of sights - inside you'll find a number of lifeless GF troops dangling from the ceiling while a bunch of Worker Splinters scurry about. Scan one of the creatures before clearing the room. Blow away the large web blocking your path to reveal the exit. Scan the GF troopers before leaving to learn of their untimely ends.
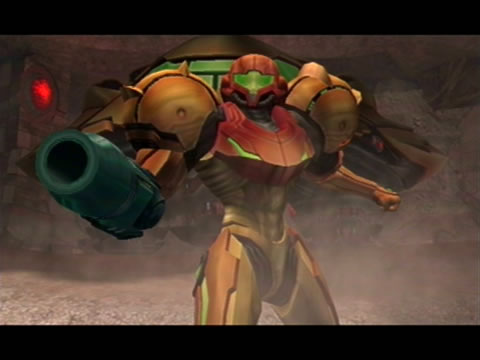
The artists at Retro have given Samus a 3D makeover.
Beyond this slimy tunnel you'll locate the second GF command chamber. This one's worse for wear, with fires sprouting up all over. Scan the lifeless trooper on the right for the first GF trooper log. The control terminal for the cargo pod gate blocking your path is offline, so you'll need to use the Morph Ball to get under it. Scan the second downed trooper for another log entry before crawling under.
Watch out for two more Worker Splinters beyond, they'll scurry off through a small opening in the wall right where you'll need to follow them through. Scan the troopers and other objects around the room to learn that the GF troopers should've known better than to build a base on top of an ant hill. Use the Morph Ball to enter the small opening in the corner, through here you'll find the power conduit for the cargo lift pod.
Blow open the grate barring your path with a bomb before entering the room. Inside you'll find another cave littered with lifeless GF troopers along with a number of fallen Splinters. On the opposite side of the machinery in the center you'll discover a Morph Ball Bomb Slot, scan it for your Logbook before jumping in and powering it up with a bomb.
With the cargo lift pod's terminal powered up it's time to head back to the command chamber. But as you make for the small exit you're in for a weird sight as ugly black twisty particles appear in the air (it's tough to describe these things) and enter the bodies of the GF troopers. They'll spring to life and open fire on you, something you probably weren't expecting.
Scan one of the zombies to learn that something has possessed them. Whatever that something is it ain't friendly. Lock on and open up on the troopers before they have a chance to pick your health off. Grab any health they drop and exit the room via the narrow tunnel.
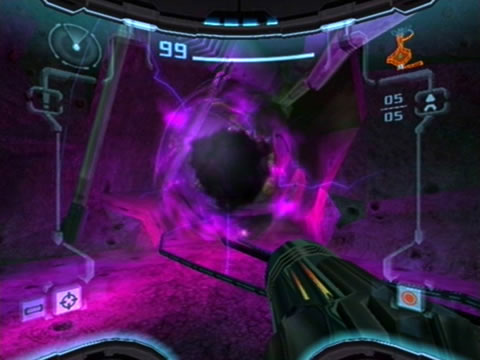
Where will this swirling portal take Samus?
Back in the command chamber you'll face three more of the lifeless possessed troopers, strafe around them and finish each one off. With the chamber clear, head back around to the cargo lift pod's control terminal and scan it to open the next path. As the lift pod retracts you'll have a welcome committee of four more possessed troopers greet you, take them all out and head through the tunnel to the next door.
Inside you'll find a storage cavern filled with crates, blow them open and grab any appearing health. Beyond this room is another chamber with a weird sight. As you enter the room a shadowy figure appears at the far end, bearing a striking similarity to Samus' Varia suit (I wonder who that might be???). The creature is seen generating a large purple sphere of swirling energy before it enters the vortex and disappears.
Once you regain control you'll find the door you entered via completely sealed, so that vortex is the only way forward. Scan the two dead creatures on either side of the room before scanning the vortex. Your visor identifies it as a dimensional rift, but doesn't know where it will take you. Hold your breath and enter the swirling sphere.
Chapters:
- Planetfall
- The World Divided
- Fate of the Federation Troopers
- The Plight of the Luminoth
- The Sands of Agon
- Dark Aether
- The Space Pirate's Lair
- Samus vs Dark Samus
- Unlocking the Dark Agon Temple
- Restoring the Energy Controller
- The Journey to Torvus
- The Everlasting Deluge
- Restoring the Flooded Temple
- Taking the Fight to the Ing
- Expanding Samus' Arsenal
- The Underwater Temple
- Securing the Dark Torvus Temple
- The Path to Sanctuary
- The Mechanical Marvels of Aether
- The Sub Guardian Nightmare
- Subterranean Conquest
- Searching the Fortress
- Retrieving the Charge Combos
- Following the Echoes
- The Screw Attack Returns
- The King of all Mechanoids
- Gearing up for the Finale
- Unlocking the Sky Temple
- The Final Treasure Hunt
- Ending the War