


Chapter 2: The World Divided

Samus steps into the darkness, ready for what lies beyond.
The next scene takes you to your first outing in Dark Aether. Samus exits the swirling vortex (now seen as a clearer blue sphere) and lands next to a small pillar adorned with a crystal. Straight ahead is the shadowy figure, seen sapping the energy from a vein of unmistakable Phazon covering a wall. By now you should realise.... this weirdo is Dark Samus, and none other than the new form of the Metroid Prime creature Samus conquered on Tallon IV. And it means business.
The camera pans up to reveal a sickly purple sky, and a bunch of some real nasty looking creatures out for Samus' blood. Before Samus can act her dark nemesis fires a shot, destroying the crystal on top of the small pillar. With the crystal destroyed the protective barrier it projects shrinks, until none of it remains and Samus begins losing energy thanks to Dark Aether's corrupt atmosphere. The dark creatures all gang up on our favourite bounty hunter, until she makes a hasty escape by diving back into the swirling blue vortex.
Samus reappears back in the real world, but minus a number of her abilities (you knew it was too good to be true). All her basic abilities remain, with advanced features like the Morph Ball Bomb, Missiles, the Grapple Beam and Spider Ball gone. But heck, at least she still has the Varia Suit this time round. Proceed through the chamber ahead where the energy vortex once was to find yet another cargo lift pod blocking access.
Look for a small opening in the wall nearby, your path is through there. The covered opening next to it houses a hidden missile, but without the Morph Ball Bomb you can't open it for now. Roll through the narrow tunnel to enter the third GF command chamber, complete with a bunch of possessed troopers waiting for you. Dispatch them and blow open the crates for any health. The door concealed behind a stack of crates houses a Save Station, head inside and save your game for now.
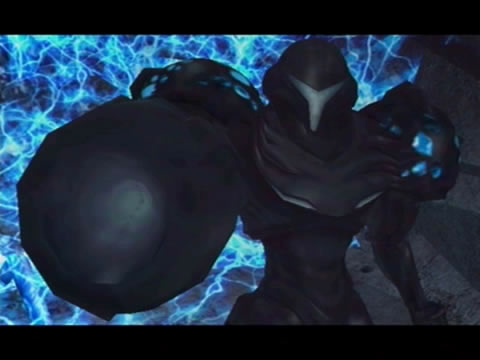
Samus' sinister new nemesis.
Exit Hive Chamber C via the door near the Save Station to locate a cargo lift. Scan the control terminal to power it up. Step into the hologram to ride the lift up the shaft. At the top you'll find a path leading left and right; the right path is blocked by a similar mechanical gate with the rotating violet hologram to the one you found earlier in the game. Head down the left path and through the door at the far side. In the next chamber, activate the control terminal beside the sealed gate to power down the locks, then blast each to open it wide.
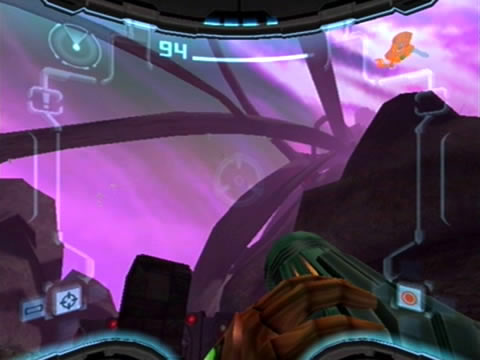
Beyond you'll get a taste of fresh outdoor air. Sweep around the area and take in the sights, you might also spot the sky randomly transitioning to a slight sickly purple colour (notice how the entire area darkens, there's even visible electrical storms) - that can't be good news.
Drop down to the base of the canyon and scan the large wide cargo container ahead - you can't destroy it so you'll need to utilize the winch system above to raise it out of the way. Scan one of the crates stacked nearby too, these creatures are indestructible too so you'll definitely need that winch system. Scan the lone control terminal nearby to activate the winch and get that cargo container hauled off. Beyond the container you'll find another locked mechanical gate your visor can't translate (remember, one's an anomaly, two's a trend), so leave it for now and head forward.
Switch on your Scan visor and scan one of the pods visible on the opposite wall ahead for the Logbook - they're a cluster of Splinter cocoons. If you blow one open it'll alert the neighbouring cocoons. Don't forget to scan the small creature crawling along the wall, this one's a harmless Green Kralee (just don't touch it). Open fire on the cocoons and take out any Splinters emerging (scan one first for your Logbook). Climb up around the canyon and follow the path till your reach a raised GF bridge. Scan it for your Logbook, then scan the control terminal nearby to disarm the locks. Shoot both atop the bridge to lower it.
Cross the bridge and carry on through the door ahead. Inside you'll find a collapsed tunnel, but thankfully a small opening present in the rock fall grants your Morph Ball access. Before entering don't forget to scan the fallen GF trooper nearby for your Logbook. Roll through the narrow tunnel and head through the exit ahead (don't worry about the two Green Kralee). Beyond you'll locate another pillar adorned with a purple crystal cluster; the same as the one you found back in the Landing Site.

The grand Temple Grounds offers amazing views.
Walk around the corner to locate a massive open area - the camera pans back revealing a huge structure towering up into the sky while identifying this as the Temple Grounds area (notice the large cargo container you moved earlier swings into view).
This open area is mostly filled with a variety of GF equipment and a few scavenging Splinters, deal with the pests before doing anything else. You'll spot a red sealed door nearby, scan it to reveal that only missiles can break through. Cross the open concourse to the foot of the massive structure twisting up to the heavens to find yet another mechanical gate blocking access. Deal with the Splinters emerging from their cocoons on the gate then turn around and head for the mechanical winch holding the cargo container in place.
That door up on the ledge beyond is where you need to be, but can't reach it for now. Scan the container and the blue section of the winch itself to learn that the lowering arm is borderline critical. Scan the control terminal nearby behind one of the powered-down pillars to lower the crate. It'll stop halfway, showing noticeable signs of failure in the connecting cable. Target the sparking weak point on the cable and open up with the Power Beam to release the cargo container.
Cross over the container and head through the now-accessible door. Inside you'll locate a long double-floored tunnel. The upper tunnel is blocked by a Mk VII gate (scan it for your Logbook), which can only be opened up by detonating a single Power Bomb, so you'll be confined to the lower tunnel for now. Cross through the tunnel and take note of the weakened wall on the right side, its Denzium compound also leaves it vulnerable to a Power Bomb explosion.
Another gate at the far end of the tunnel blocks your path, so scan the large control terminal on the left to open it up. By opening this gate it'll also seal the tunnel behind you with a Mk VII gate, so there's only the way forward now. Blast the emerging Splinters and head through the door beyond the gate.
The purple haze is definitely not a natural occurence.
Once outside again you'll find the GF trooper's communication area. Follow the winding path and deal with any pesky Splinters. Eventually you'll find a downed GF trooper beside a control terminal. Scan the trooper for your Logbook before accessing the terminal. Activating the terminal will engage the large communications dish directly above, but thanks to good old atmospheric interference the signal can't get through to the cold of space.
Continue on down the path to find the next door. Inside the cave housing the door you'll be greeted by another group of Dark Troopers, deal with them all before moving on. Inside the next tunnel you'll find an odd sight, a GF automated turret is busy pasting the walls with Splinters. Help it clear out the Splinters before scanning it for your Logbook. Keep your distance though, as this thing's IFF is totally dead so it'll open up on you as well. Destroy it before moving closer.
Your path is blocked by another Mk VII gate, but that won't stop you from crawling through the small opening nearby with the Morph Ball. Once on the other side, scan the fallen GF trooper (this one's a fan of Samus) before scanning the control terminal to raise the gate. Crawl back through the tunnel and keep the Morph Ball active, as the broken gate is malfunctioning and erratically opening and closing. Sneak through it when it raises and head through the door beyond.
Chapters:
- Planetfall
- The World Divided
- Fate of the Federation Troopers
- The Plight of the Luminoth
- The Sands of Agon
- Dark Aether
- The Space Pirate's Lair
- Samus vs Dark Samus
- Unlocking the Dark Agon Temple
- Restoring the Energy Controller
- The Journey to Torvus
- The Everlasting Deluge
- Restoring the Flooded Temple
- Taking the Fight to the Ing
- Expanding Samus' Arsenal
- The Underwater Temple
- Securing the Dark Torvus Temple
- The Path to Sanctuary
- The Mechanical Marvels of Aether
- The Sub Guardian Nightmare
- Subterranean Conquest
- Searching the Fortress
- Retrieving the Charge Combos
- Following the Echoes
- The Screw Attack Returns
- The King of all Mechanoids
- Gearing up for the Finale
- Unlocking the Sky Temple
- The Final Treasure Hunt
- Ending the War