


Chapter 13: Hunting the Rogue Machine

These pesky drones don't like you using their cables.
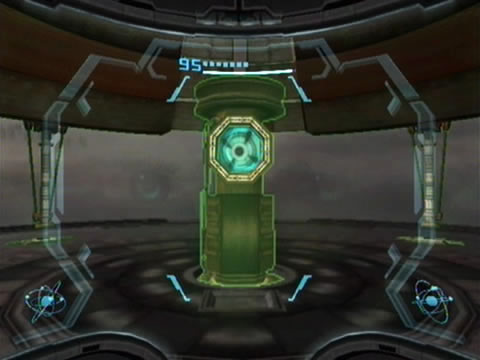
Scan one of the terminals above the alcoves to learn that Aurora 217 is now online but currently not connected to the global AU network. There's not much you can do about the damaged circuit panels and you can't follow Ghor through the hatch, so instead climb back up the maintenance tunnel to visit 217. Activate the terminal in front of the holding tank to commune with the supercomputer.
With an almost gender-neutral voice, 217 thanks you for your help (curiously it was having a terrible dream...) and explains the scenario. Although 217 is back online, Ghor damaged vital circuitry and has disabled 217's ability to interact with SkyTown. Without any other choice, 217 suggests that the very weapon Ghor used to damaged the equipment could be used to repair it, so Samus is given the grim task of hunting him down.
Once back in control, if you head back over to the Spire Dock you'll find Ghor's armour mysteriously absent (and all that time Samus could've just knocked it over the edge!). Save your game near the Aurora Chamber before initiating your search. Since Ghor's retrieved his armour from the Spire Dock, let's head back towards the general direction of your ship.
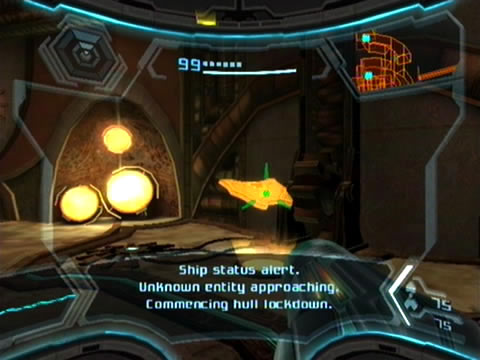
Someone is approaching Samus' gunship, and it's not her...
Head for Zipline Station Bravo and ride the cable over to the Steambot Barracks pod. No doubt as you enter the Barracks Lift chamber you'll receive a priority distress call from your ship - something's closing in on it fast. Quickly take the lift down one floor and enter the Steambot Barracks chamber. Thankfully there's no hostiles left to deal with here, but we will need to find a way back up the tall shaft.
See the large round device directly opposite? Scan it to reveal that a kinetic charge is required to energize the device. Sounds good enough - you know what to do. Hop inside the device and use the Boost Ball to summon a handy half-pipe in the center of the chamber. Scan the slope for your Logbook before using the Boost Ball to build enough vertical momentum to reach a ledge high above (remember to boost into a slope as you roll up into it).
High above you'll find yourself on the opposite side of the gear-barrier which blocked your path on your first trip down. Simply interface with the control unit beside the gate and follow the on-screen instructions to open the path. Swing around the corner and ride the lift up to find your exit. Cross the next corridor and step outside to the Transit Hub region.
Thankfully there's an inactive Kinetic Orb Cannon providing a handy shortcut right outside, so use the Boost Ball to restore power quickly. Hop in the cannon for instant transit to the opposite pod, bypassing the central hub of the region (where that huge Theronian containment unit resides). Step inside the Hub Access corridor and watch out for a number of Dragoons ambushing you here - these ones like to take cover behind pistons.
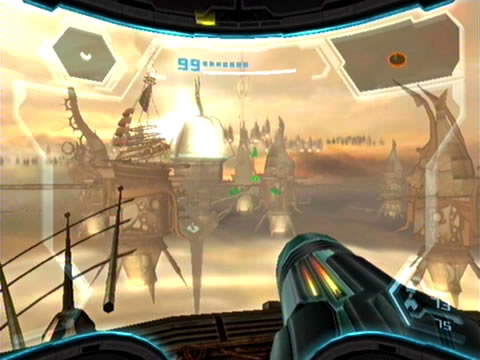
Enjoy the grand view for a few seconds.
Clear the area and move onward to the Arrival Station. Step outside to the balcony and clear out any Tinbots guarding the region. Now before you move onward, take a slight detour and leap up to the visible Grab Ledge high above the balcony. Use the Boost Ball to restore power to the inactive orb cannon present and use it to launch yourself way over to the floating satellite. There you'll discover Energy Tank ST.02 waiting patiently, it'll certainly come in handy soon.
Quickly take in the breathtaking panoramic view from here before using the orb cannon nearby for return transit. Step inside and watch out for another Tinbot patrol waiting near the exit. Move through to Zipline Station Alpha - by now your ship may send another distress signal and report sustained hull damage - that crazy robot's beating up your ship!
Grapple the Zipline Cable and watch out for a myriad of obstacles as you travel across. Upon landing quickly enter the Main Docking Access chamber. Two Dragoons float up from the chasm ahead - quickly destroy them both before swinging across. Your ship will chime in with another calm but urgent report - its hull armour is reaching critical levels.
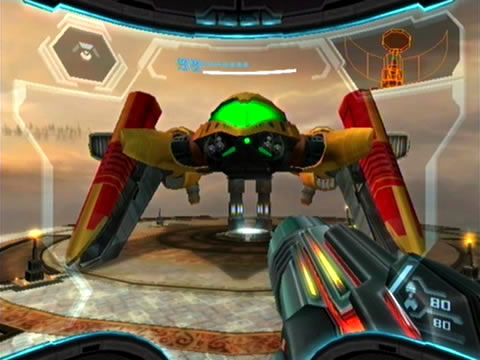
No time to lose - clear the corridor without delay and step through to the Main Docking Bay. Run forward and peer through the observation window - sure enough, there's Ghor, fully equipped in his armour suit, happily pounding into the hull of your ship. Now that's just mean. Quickly run down the ramp and outside to face the menace.
Ghor happily returns your ship to you, smashing it into the door frame and collapsing part of the Chozo bust to crush your exit. Amazingly, Samus' gunship remains in the air and visibly intact despite billowing black smoke and leaking fuel streaming from its engines. Samus manages to send her ship to safety before facing down Ghor.
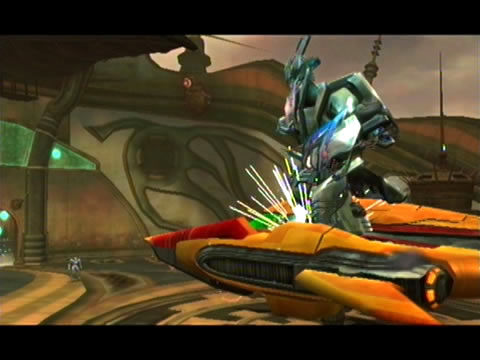
Phazon corruption has certainly drained Ghor of any decency.
He'll deliver a quaint speech on the eventual Phazon corruption of everything, so let's prove him wrong. Ghor challenges you equipped with his bulky armour suit (Samus really should've disposed of it back on the Spire Dock), refer to the bosses guide for tips to conquer Dark Samus' second puppet.
With Ghor's powered armour failing and leaving him in a heap, the spooky (and cowardly) specter of Dark Samus appears to seal Ghor's fate. Samus fires at the apparition without luck, the creep absorbs Ghor before slinking away. The bittersweet end of the battle rewards you with a powerful upgrade - the Plasma Beam. Pick up the weapon upgrade to combine its heated projectiles with your standard Power Beam (notice it takes on the Ice/Dark Beam's visual arm cannon configuration).
With this deadly new weapon in your arsenal you'll be able to melt almost anything and open up orange doors. Samus commands her gunship to return, and although it manages to land you won't be able to fly it for some time yet. But be sure to save your game before heading out. Scan the ship to learn that auto-repair functions inside are already hard at work on repairs. Try out the Plasma Beam right away, see the bunch of damaged metal panels blocking the exit of the docking bay? Use your new toy to easily melt them from your path.

Defeat Ghor to score the deadly Plasma Beam.
Climb up the ramp to find the observation window heavily damaged, and don't forget to melt the visible damaged metal panel to reveal Missile Expansion ST.04 hidden inside the ruined structure poking through the window. Pick it up before starting your long journey back to Aurora 217. Exit the Main Docking Bay but hold off swinging across the chasm in the Main Docking Access chamber. See the trio of creatures roosting on the ceiling further ahead? Scan one for your Logbook to reveal them as Elysian Shriekbats - robotic versions of the regular dive-bombing critters.
Shoot them all down safely from afar before swinging over the chasm. From here travel across to the Transit Hub - making good use of the Plasma Beam's deadly fire along the way (watch as it literally melts robotic foes). You may have difficulty moving along the Zipline Cables however, as the slightly slower rate of fire from the Plasma Beam can be troublesome when shooting down pesky obstructions along the cables.
Upon arriving at the Transit Hub, use the orb cannon to arrive atop the pod containing the Theronian containment unit. Travel across to the opposite platform where the Kinetic Orb Cannon covered in damaged metal debris lives. Melt the panels to grant access to the cannon, then simply hop in to find yourself blasted way over to the Aurora Chamber's pod, completely bypassing the Steambot Barracks region.
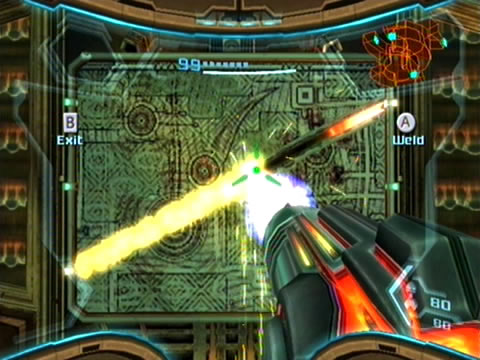
Use your welder to repair Ghor's recklessness.
Step inside and move through to 217's chamber, saving your game along the way if you wish. As you take the lift down one level, melt the damaged metal debris on your left to find a group of SkyTown storage units; blow them open to find some serious health and ammo refills inside. Step inside the Aurora Chamber and speak to 217 - it'll ask you to repair the damaged circuits below in the maintenance chamber.
So let's head down below through the tiny tunnel in the corner. No more Tinbots down here, so you're free to get to work. Step in front of a damaged circuit panel and press A. Watch as Samus' arm cannon deploys a small welding implement, using a small charge from the Plasma Beam for power. Point at one end of a damaged conduit and hold A to engage the welder. Sweep your reticule across the conduit to the other end, doing so will seal the rupture and restore the panel's function.
SkyTown holds many secrets.
Move about the chamber restoring the remaining circuits, upon doing so the red error message displayed on all the terminals will read "Communications online." Job well done. With Aurora Unit 217 now fully restored, it's finally time to target the Leviathan Seed. Head back upstairs and don't forget to scan 217 for your Logbook.
Speak to the supercomputer to learn about its plan - with SkyTown fully operational again efforts can be made to breach the Leviathan's shield. Except unlike back on Bryyo, Samus won't be able to physically travel beneath the clouds to destroy the shield generators. Instead, 217 offers the solution of building a massive explosive device (for lack of a better term) to drop on the shield directly. SkyTown possesses such devices (remember that Theronian containment unit?), but Samus will require extra help to lift and assemble the device (she may be able to hide Energy Cells on her person, but there's no way she'll be lugging around a gigantic bomb).
Energize this Bomb Slot to access the landing pad.
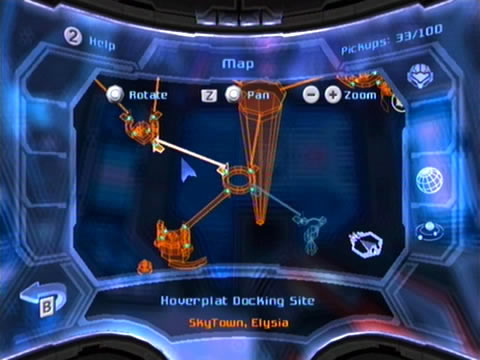
Aurora 217 speaks of a Federation landing site far to the east of your current location, so we'll head there next looking for further upgrades to help assemble the giant bomb. You'll be granted a complete map of this region of SkyTown, revealing a few extra chambers yet to be explored. For now we'll head for a portion of SkyTown you couldn't really explore properly before. Exit the Aurora Chamber and head for the Spire Dock.
Once there, blast yourself aboard the Spire Pod and head for the Zipline Cable over on the left side of the deck. As you travel towards it you'll receive an update from your ship - auto-repair functions are complete and the ship's back in regular service. So quick!? Her ship is almost peeled apart by a hulking cyborg and it fully repairs itself in minutes, while damage from a lightning strike in Aether's atmosphere takes her other ship hours to repair? Ah well, this gunship just loves to show its abilities off.
Anyway, cross the short Zipline Cable and head inside the Security Station. Directly before you lies an orange door, a single blast from your Plasma Beam will open it wide. Step inside to discover a tall shaft adorned with a pair of shimmering green wall panels. Veterans of Echoes will know what's needed here. Aurora 217 chimes in, offering a hint that perhaps technology required to scale the shaft awaits not on Elysia, but a previous location Samus has visited.
...To summon your ship and find it good as new.
This technology can't be on Norion, so that only leaves Bryyo to search. Exit the chamber and travel around to the southern side of the Security Station. Before heading through the southern exit there, look for a small pipe section blocked by a damaged metal panel resting near the large rotating gears. Melt it away with your Plasma Beam to discover a cracked hole in the piping. Fire up the Morph Ball and roll through - follow the tunnel network around to eventually reach Ship Missile Expansion ST.01.
With this region clear head on through the southern exit and ride the lift down to the Landing Site A platform. Last time you couldn't do much about the shutters securing the landing pad, but this time Aurora 217 summons a Bomb Slot at the center to aid your efforts. Simply energize the slot to retract the shutters (in such a graceful mechanical style, boy this place is gorgeous), activating a set of landing beacons to allow your ship to land.
Chapters:
- GFS Olympus
- Meet the Hunters
- The Liberation of Norion
- Heroes Corrupted
- A Broken World Ravaged by War
- The Deadly Phazon Threat
- A Fallen ally
- Samus' Gunship on the Frontlines
- Disabling a Leviathan's shield
- Heart of the Phazon Corrupter
- Chozo Paradise Among the Clouds
- Restoring Aurora Unit 217
- Hunting the Rogue Machine
- Uncovering Bryyo's Secrets
- Ghost Ship
- The tip of the SkyTown Iceberg
- Piecing together the Leviathan's Bane
- The Metroids Arrive
- Save the Second Chozo World
- The Pirate's Homeworld Unveiled
- Rescue operations in Enemy Territory
- The Final Chozo Gift
- Repositories of Chozo and Pirate Worlds
- Phazon Mines Part 2
- Breaking out the Heavy Weaponry
- Storming Pirate Command
- Join the Federation's Leviathan Strike
- Return to Norion
- Excavation of the Bryyo Ruins
- Bryyo's Final Bow
- Charting out the Ruined Valhalla
- Aurora 313's Final Message
- Ridley's Final Phazon Fight
- Opening the Wormhole
- The Source of the Poison
- The Masters of Phaaze