


Chapter 7: A Fallen ally
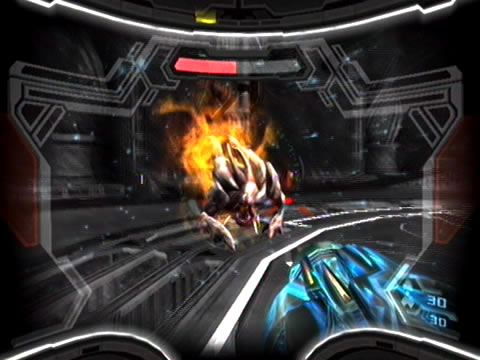
Warp Hounds can teleport thanks to Phazon exposure.
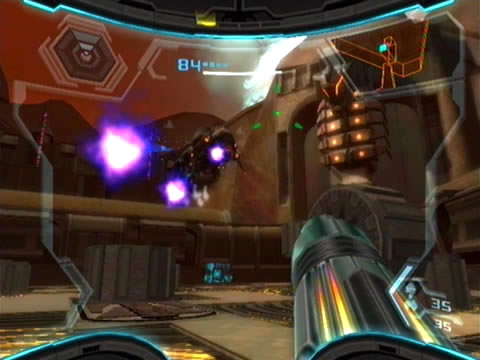
This huge chamber possesses a massive Fuel Gel pumping system which you'll need to raise fully from the floor to enable transit up to Rundas' ledge. Cross the chamber to the other side, as you do a huge gate blocks access to the object there while the entrance seals itself. Three large hound-like beasts promptly emerge from thin air to confront you - scan one to reveal them as Warp Hounds. These canines can easily teleport around the chamber at will, and spit globular fire to slow your movements, so try to keep them in view at all times.
Don't hesitate to use Hypermode, but be warned as you can now enter Corrupt Hypermode after ten seconds of use. Deal with the trio of hostiles to regain access to the object on the far side of the chamber. Scan the object to learn that igniting both Fuel Gel spouts will energize a Bomb Slot on the device. Also remember to scan the Age of War entry on the wall for your Logbook (there's nothing pleasant about this one, it turns out the Bryyonians loyal to science engaged in all-out war with those still siding with primal traditions).
Ignite both Fuel Gel spouts on the Bomb Slot, then lay a bomb in the device to raise the Fuel Gel tower up one level. As the tower rises, four Gragnols pop out from the housing. Jump atop the tower and clear out all hostiles before proceeding. Look at either side of the tower, see the retracted maintenance chutes? Grapple each one to bring them back into position, then climb up to the open alcove on the west side.
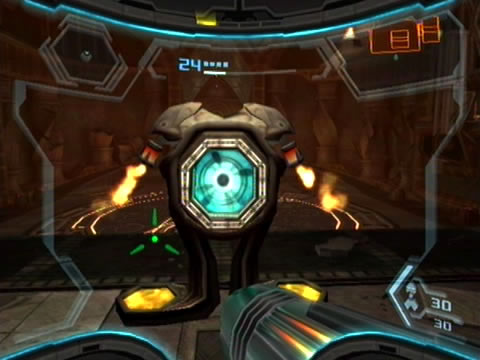
Bomb Slots power ancient technology.
Inside you'll discover an inactive Fuel Gel flow regulator. See the control pump beside the unit? Interact with it and follow the on-screen instructions to send forth a torrent of Fuel Gel from each regulator. Then simply send a Charge Beam blast into each spout to ignite the Gel and rotate the regulator into position. With both regulators rotated you'll find a handy maintenance tunnel available. Roll through and beyond the tower to find the next control unit. Ignite both spouts before laying a bomb in the device to move the tower up another level.
Roll back through the maintenance tunnel and climb up to the apex of the tower. This time four Gragnol Adults were released from the tower, so use your Grapple Lasso to deal with them all first. Look at the southern wall, see the large intricate machinery there? Scan it to learn that this Fuel Gel vat is overflowing with juice and is ready to blow. Look for a valve cap near a pump line and tear it off with the Grapple Lasso. With a steady stream of Fuel Gel pouring out, ignite it to rotate the fuel line around. Ignite the second spout to rotate it yet again, this time sending the flames from the first spout right into the Fuel Gel vat.
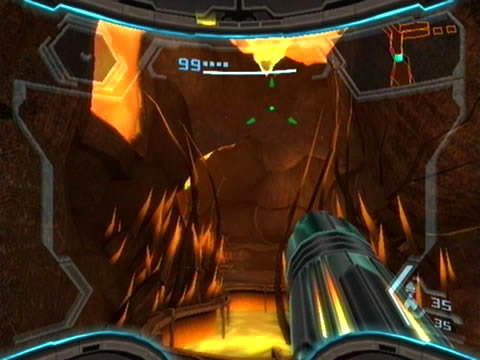
Fuel Gel pools give this cavern a lava-like appearance.
A mighty explosion rips the vat apart, destroying the fuel lines running around the chamber's walls. With a network of tunnels etched in the walls revealed, climb up and roll through (first scan one of the Phazon Pillbugs rolling about the tunnels for your Logbook). Use bombs to deal with the pesky Phazon Pillbugs along the way (they must be disappointed that their Spider Ball Guardian is nowhere to be seen). Exit the tunnels to find yourself in an elaborately-detailed balcony overlooking the tower. Activate the final control unit to send the tower up to its final position.
Clear the four Gel Puffers before leaping across to the tower. See the shimmering thin green panel on the ledge where you spotted Rundas earlier? Scan this Grab Ledge to learn that Samus can grab hold of these panels to pull herself up (just like in Metroid Fusion and Zero Mission). Leap towards the Grab Ledge - watch as Samus pulls herself up.
Exit the Gel Processing Site to discover a chamber filled with Fuel Gel beyond (notice the fumes pluming up from the liquid - good thing we never find out what this stuff smells like). A few interesting specimens inhabit this area. Clear out the three Gel Puffers floating about before taking a look around. Scan the stone Golem head pouring Fuel Gel from its mouth to learn that it won't stop rotating or spewing the combustible liquid. You may also spot a creature leaping up from the Fuel Gel pool every so often - this Gel Ray will be difficult to scan for your Logbook, but try to stick around long enough to eventually catch it as it leaps up.
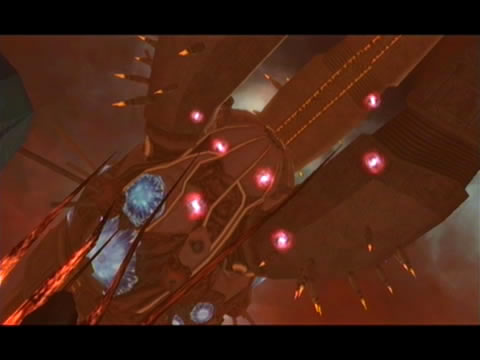
A massive Pirate destroyer guards the Temple of Bryyo.
Look up on the ceiling near the Golem head, see the thick yellow cable? This object is invulnerable to your weaponry, but not fire. Wait for the Golem head to rotate around and face the cable, then send a Charge Beam blast at the Fuel Gel pouring from its mouth to ignite and destroy the cable. A platform will collapse from the ceiling, neatly bridging the pool and offering Missile Expansion BR.05. Leap across to the opposite door and grab the item along the way.
Beyond the Gel Hall lies a handy save station, be sure to make use of it before moving on. Ahead lies a chamber you'd think came straight out of Norfair (although the orange ceiling looks somewhat like lava, so the room appears upside down - but sure is pretty). Deal with a trio of loitering Hoppers before moving through. Past here lies another cave filled with small Fuel Gel pools, except these ones possess huge spouts in the ceiling which periodically spew the dangerous liquid from.
Carefully leap over the pools as the spouts stop flowing. On your way through you may notice a spout constantly pouring liquid ceaselessly on the right - remember its location for later. Leap over the next pool and watch out for a pesky Gragnol (don't shoot at it through the spouts as they ignite when hit and hurt in close proximity). Clear this chamber to find yourself at the base of a sloping tunnel - one inhabited by a number of small glowing bugs. These odd specimens like to bounce around the tunnel walls, scan one to reveal them as Gelbugs. These little critters are filled with Fuel Gel, and as such will explode violently when hit. As such, take them out safely from afar before entering the tunnel.
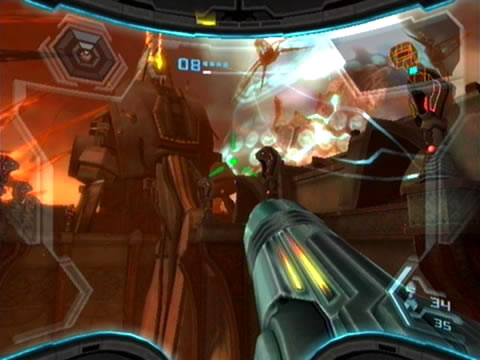
Cross the tunnel and exit ahead to locate a ruined curving hallway. Turn the corner to locate the massive Temple of Bryyo - a gigantic open-air region filled with Space Pirate equipment (it's so huge you can see the Leviathan from here). Watch as the camera pans up, revealing an awesome sight. One of the Space Pirate destroyers has arrived and promptly opens fire on the temple, but thankfully you're far too small of a target for those massive blasts to pinpoint.
The destroyer promptly deploys ATCs.
Instead, expect some company in the form of a Space Pirate ATC. Four hostiles deploy from the ship, so immediately activate Hypermode and try to shoot down the ATC before they leap out (especially on Hypermode difficulty, as you'll need to preserve your health for later). Otherwise deal with the hostiles one at a time and watch for any using Hypermode. Their ATC oddly hangs around as well so try to finish it with your Hypermode weaponry.
Clear all hostiles and watch as yet more ATCs move in to attack. Except this time things are different. Just like back on Norion, Rundas comes to your rescue, freezing and demolishing any Pirates crazy enough to stick around. As he emerges up from a huge ice stalagmite formation you'll notice his Federation PED gear strapped over his head. Scan Rundas once you regain control - everything seems normal, except why hasn't he spoken a word?
Within seconds his motives are made clear. Rundas tries to deliver Samus the same fate as the other Pirates, but to no avail. He then charges himself up for a final showdown, so unfortunately there's nothing else you can do. An apparition of Dark Samus briefly flashes over Rundas, so he certainly isn't acting on free will.

Rundas... Is he friend or foe?
Refer to the bosses guide for tips to conquer the first lost hunter, and watch as Rundas suffers a fate he certainly doesn't deserve (Dark Samus certainly likes to make others fight its battles). Despite the loss, Rundas leaves behind something handy - the Ice Missile upgrade. With this upgrade in your arsenal, all your Missiles become sub-zero projectiles, capable of freezing Fuel Gel, hostile targets and breaking through white blast-shielded doors.
With your new toy in hand, check your map. We're now very close to the first Leviathan shield generator. Grab all the health and Missile refills before hopping aboard the elevator at the center of the temple. Step into the Temple Reservoir chamber beyond and take a look around. An impassable Fuel Gel pool stretches around the floor of the chamber, except this time there's something you can do about it. First scan one of the Scorchbugs crawling all over the opposite wall. Also wait by the shore of the Fuel Gel river, eventually a Gel Ray will pop up out of the liquid (scan it if you haven't already).
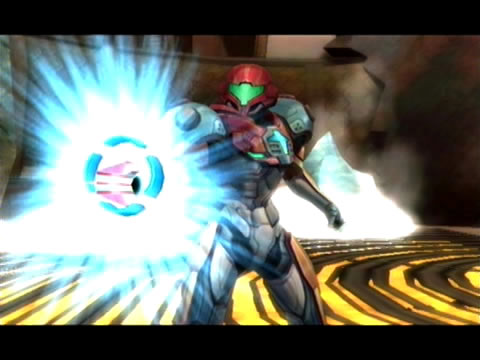
The Ice Missile upgrade grants Ice Beam functionality.
Now to cross the river. Fire a single Ice Missile into the liquid, then watch as it amazingly solidifies enough of the liquid to create a temporary stepping stone. Quickly leap aboard and fire another Ice Missile into the liquid ahead to create another frozen foothold. Leap across to clear the Fuel Gel easily. Beyond lies the Temple Hall - and an impassable chasm blocks you path (don't look down...). Deal with the Shelbug living on the wall ahead before it delivers any spines. See the pump control unit on the wall nearby? Interface with it and follow the instructions to open the Fuel Gel spouts lining the chasm walls.
Now for some fun. Aim at an active torrent of Fuel Gel pouring from the wall and fire an Ice Missile directly into it. The blast will promptly freeze the liquid and create a hardy platform. Leap aboard and freeze the next spout. Use this method to clear the chasm and reach the far side - just don't hang around too long on the frozen platforms as they'll shatter after a short time.
Just one of the towering Leviathan shield generators.
Exit the Temple Hall to finally locate the first of the pair of Leviathan shield generators. Activate the hologram terminal directly ahead to see a schematic of the generator, and don't forget to scan the Downfall lore entry on the wall nearby (nothing nice in this one). Step around the corner to the window overlooking the generator. The device sure isn't small - the massive generator lies ahead near the base of the Leviathan's embedded position. Scan the structure to learn that its hull is composed of Maldium.
This and the fact that you can't reach the generator on foot should give you enough clues - Samus' gunship is the only thing in your inventory capable of reaching the generator, except it currently has no way of damaging it. Aurora 242 chimes in and offers this hint as well (it's a very thoughtful supercomputer). Exit the shield generator chamber and work your way back to the Temple of Bryyo.
Chapters:
- GFS Olympus
- Meet the Hunters
- The Liberation of Norion
- Heroes Corrupted
- A Broken World Ravaged by War
- The Deadly Phazon Threat
- A Fallen ally
- Samus' Gunship on the Frontlines
- Disabling a Leviathan's shield
- Heart of the Phazon Corrupter
- Chozo Paradise Among the Clouds
- Restoring Aurora Unit 217
- Hunting the Rogue Machine
- Uncovering Bryyo's Secrets
- Ghost Ship
- The tip of the SkyTown Iceberg
- Piecing together the Leviathan's Bane
- The Metroids Arrive
- Save the Second Chozo World
- The Pirate's Homeworld Unveiled
- Rescue operations in Enemy Territory
- The Final Chozo Gift
- Repositories of Chozo and Pirate Worlds
- Phazon Mines Part 2
- Breaking out the Heavy Weaponry
- Storming Pirate Command
- Join the Federation's Leviathan Strike
- Return to Norion
- Excavation of the Bryyo Ruins
- Bryyo's Final Bow
- Charting out the Ruined Valhalla
- Aurora 313's Final Message
- Ridley's Final Phazon Fight
- Opening the Wormhole
- The Source of the Poison
- The Masters of Phaaze