


Chapter 18: The Metroids Arrive
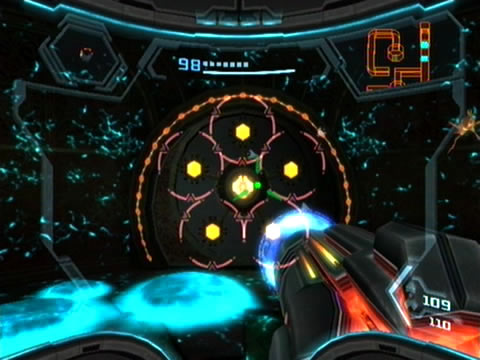
Use the Seeker Missile to escape this sealed dome.
Backtrack to the main holding area to find most of the containment units shattered and their occupants gone, glass fragments littering the floor. Uhoh. Keep going to spot rogue Metroids flying along the tunnels above and below your floor. Head down a long corridor and turn left - a multi-lock blast shield down the hallway is visible ahead. Step forward and watch as a lone Metroid streaks into the room, literally appearing through the wall.
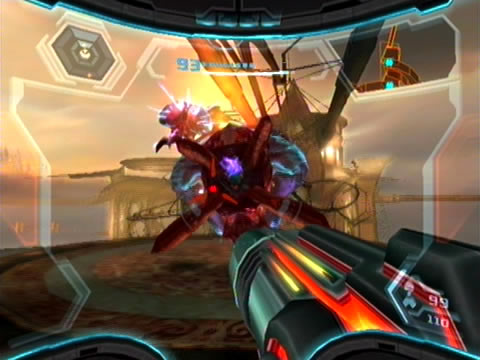
Quickly scan the target to reveal it as a Phazon Metroid: Phazon corruption has granted these pests the ability to phase in and out of the local dimension to pass through solid objects (so they could ambush you from any angle). Naturally the old weakness to cold comes with these Metroids, except they're smart enough to phase out when you deliver a Missile to avoid the projectile easily.
Instead, pound the target with your Plasma Beam, and if it charges at you with its underside on point quickly fire an Ice Missile to freeze the target solid. Also watch out for a charged electrical attack. Blast it quickly to down the hostile. If you're ever caught in a Metroid's life-sucking grasp, quickly enter Morph Ball mode and a lay a bomb to break free.
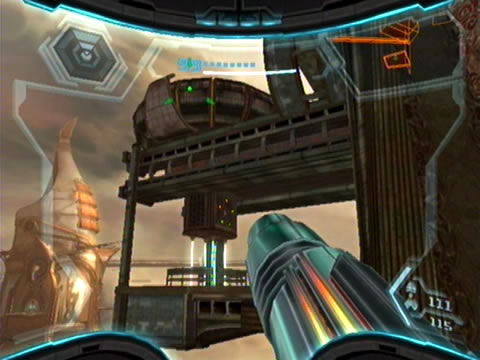
With your position clear, use the Seeker Missile to lower the multi-lock blast shield up ahead. Move ahead around the twisting corridor to find one more ambushing Metroid on the way to the lift. Dispatch the target quickly and travel down to Xenoresearch A. Enter the holding area and step around the corner. You'll see more Metroids zip along the tunnel beneath the floor before two emerge from the ceiling and attack. Deal with both before moving on (don't try to outrun them).
Wild Metroids quickly escape their captivity.
Keep moving to eventually face a second pair of Metroids. Beyond these two lies the chamber where you used a Spinner to open the way forward, but your exit is blocked. Instead, backtrack and look for a nearby corridor possessing a multi-lock blast shield. Use the Seeker Missile again to break through - you're almost there.
Step forward to face the final group of angry Metroids blocking your path, this time four apiece. Lock onto one and keep firing Missiles into the pack to hopefully catch one off guard, otherwise keep firing Plasma Beam shots (or use Hypermode) to slowly clear the trouble out. If they back you into a corner, react by swinging around and backtrack in the opposite direction.
With all four hostiles dealt with, finally exit this creepy lair to discover Energy Tank ST.03 still waiting for you in Xenoresearch A Lift. Simply breach the containment unit with a Missile and step inside to claim your prize. Step aboard the nearby lift and ride it back down to the Research Pod Lift. From here feel free to return to the save station nearby to save your game, just watch out for another loose Metroid in Transit Tube A. If you step outside to the Zipline Station Delta balcony you'll find that the floating platforms are too high to reach, so there's only one way forward.
Remember spotting a multi-lock blast shield in the Research Pod Lift chamber? Head back there and lower the shield thanks to the Seeker Missile. Ride the active lift on the other side up the shaft and step through to Transit Tube B. Here you'll amazingly discover a lone survivor - an Armored Pirate Trooper. Deal with the target if you wish before heading outside.

Unlock the Theronian containment unit with your handy Seeker Missile.
Out on the upper region of Zipline Station Delta, two recently-freed Phazon Metroids greet you on the balcony. Deal with both before hitching a ride on the cable back to the pod on the southern side. Two more Metroids emerge from the wall as you land - these creatures just don't give up. Fry both and take a look back at their pod structure in the distance - see all the tiny Metroids floating about in the air? Oops... Thankfully they won't follow you any further. You might also spot the Leviathan Seed off in the distance here, incredible that such a tiny object (from this vantage point) can cause so much trouble.
Step inside Concourse Access B to discover a lone Databot inhabiting the corridor. This one carries the Loss lore entry, and details events all too familiar. Just like the incident on Tallon IV, the Elysians actually detected the Leviathan impacting Aether all those months ago. Except this time they managed to discover its origin and means of travel - a wormhole was created as the Leviathan departed from a sentient planet an incredible distance away from civilisation.
But by the time the Elysians tried to send this report to the Federation, the computer virus implanted by the Pirates had already affected the now-cured Aurora 217. So more and more of the pieces are coming together. Remember reading a Chozo lore entry way back on Tallon IV where the Chozo pondered the origin of the Phazon-riddled meteor? We're getting closer and closer to finding out.

Return to AU 217's local SkyTown neighbourhood.
Dismantle the white blast shield on the far side of the corridor and step through to find yourself back inside the Concourse. Turn left and face the nearby wall, see the small opening in the corner? Roll through here to locate Missile Expansion ST.07 hidden in a small alcove beyond. But there's more to be found here. Right outside the open window lies one of the three multi-lock panels holding the huge Theronian containment unit in place. From here, lock onto all four pods with the Seeker Missile and let them fly to strike all at once, releasing the panel.
Roll back through the small tunnel and look for an elevator beyond. This is the one you found some time ago from the floor below, but couldn't access thanks to an active lock system. Use the Seeker Missile again to hit all four lock pods holding the elevator in place.
With power restored, take the lift down to the floor below and stand at the entrance of the main chamber. Look up at another of the locked panels attached to the containment unit. Use the Seeker Missile to release this panel, then stroll over to the third and final one over on the right.
At last, the final bomb component.
Detach this final panel to release the unit and open a huge hangar bay door in the ceiling. Simply activate the Command Visor and lock onto the target below the unit to summon your ship. Watch as it arrives above, complete with transport module in tow. Lowering the transport module, watch as your ship precisely inserts the transport module into the containment unit, locking it into place and miraculously lifting off with the huge payload secured.
Nice work, only one containment unit left to find. We're now done with Eastern SkyTown, so we'll return to the main SkyTown complex via the nearby tram. Exit the Concourse and travel through Concourse Access A to find yourself back at Skytram East. With no ATCs hassling you, step aboard the tram and enjoy the ride back.
Once back in the serene SkyTown main complex, climb back down to the Spire Dock. There's no point in visiting Landing Site A nearby, as you can't summon your ship for now (if you did, both collected Theronian bomb parts would return to their original locations, and you'd need to backtrack and retrieve them again - something you definitely don't want to do). Once aboard the Spire Pod, use the Kinetic Orb Cannon to return to Aurora 217's pod structure. Pay the Aurora Unit a visit if you wish on your way through.

Samus' gunship departs with its immensely heavy load.
Travel up to Zipline Station Bravo but don't take the Zipline Cable. Remember the orb cannon here covered by a multi-lock blast cap? Make short work of the cap by firing at all four lock pods simultaneously with the Seeker Missile. Use the cannon to enable quick transit way over to the far Transit Hub - the resting place of the final bomb component.
Leap over to the lock system beneath the bomb unit holding it in place. Use the Seeker Missile to release the lock unit. Simply summon your ship to pick up the final piece of the puzzle, completing the thermonuclear bomb. Watch as your ship departs, it's quite amazing to see it lug about a gigantic bomb a few times it's own weight.
Aurora 217 chimes in with a congratulatory statement - now with the completed bomb the final stage of attacking the Leviathan can begin. 217 directs you to place the bomb in the cargo hold of the Spire Pod, so we'll head back there now. Use the Kinetic Orb Cannon on the balcony nearby for quick transit back to 217's pod.

Place the bomb in the Spire Pod... gently.
Head down to the Aurora Chamber and outside to the Spire Dock. Launch yourself aboard the structure and fire up the Command Visor.
Look for a target at the center of the deck, lock on to summon your ship. Watch as the massive cargo bay doors atop the Spire open wide, allowing the gunship to deposit the tiny-in-comparison bomb unit inside (thankfully the doors wait for the gunship to fly clear before sealing again).
With the bomb in place 217 chimes in, requesting your presence in the Aurora Chamber to discuss the final assault plans. There's nothing else for us to do for now, so we'll head back there now. Be sure to save your game anywhere first before speaking to 217.
Chapters:
- GFS Olympus
- Meet the Hunters
- The Liberation of Norion
- Heroes Corrupted
- A Broken World Ravaged by War
- The Deadly Phazon Threat
- A Fallen ally
- Samus' Gunship on the Frontlines
- Disabling a Leviathan's shield
- Heart of the Phazon Corrupter
- Chozo Paradise Among the Clouds
- Restoring Aurora Unit 217
- Hunting the Rogue Machine
- Uncovering Bryyo's Secrets
- Ghost Ship
- The tip of the SkyTown Iceberg
- Piecing together the Leviathan's Bane
- The Metroids Arrive
- Save the Second Chozo World
- The Pirate's Homeworld Unveiled
- Rescue operations in Enemy Territory
- The Final Chozo Gift
- Repositories of Chozo and Pirate Worlds
- Phazon Mines Part 2
- Breaking out the Heavy Weaponry
- Storming Pirate Command
- Join the Federation's Leviathan Strike
- Return to Norion
- Excavation of the Bryyo Ruins
- Bryyo's Final Bow
- Charting out the Ruined Valhalla
- Aurora 313's Final Message
- Ridley's Final Phazon Fight
- Opening the Wormhole
- The Source of the Poison
- The Masters of Phaaze