


Chapter 3: The Liberation of Norion
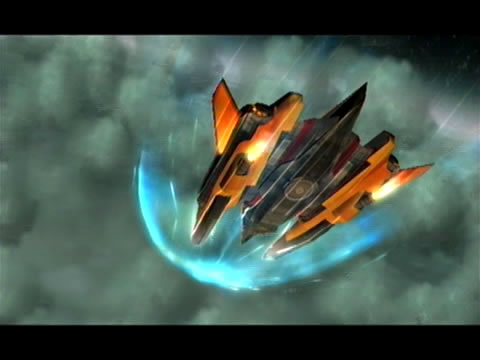
Samus heads for the heated battle on Norion's surface.
Boy, these are surely sights Samus is certainly not accustomed to. Upon entering Norion's atmosphere and touching down in the Federation complex, you'll see just how much mayhem is going on with Space Pirate fighters streaming around everywhere. A GF Marine greets Samus immediately upon landing and gives a brief of the scenario. Pirate forces have disabled three main power generators - without these sources of energy the facility's main cannon can't be powered - and it's the only thing capable of repulsing those monstrous destroyers. The Marine then gives you the locations of all three generators on your map, so let's get to work.
Step forward toward the sealed door beyond the pair of turrets furiously firing at hostile targets - watch as one turret suffers a direct hit. Unlock the door ahead by simply firing at each of the four red door locks (although you should take note, if you explore behind Samus' gunship you'll find a Missile Expansion out-of-reach at this time). Step inside the open chamber to discover a small sealed alcove. See the glowing blue item inside? Scan the object to reveal it as the Grapple Lasso - your first true suit upgrade.
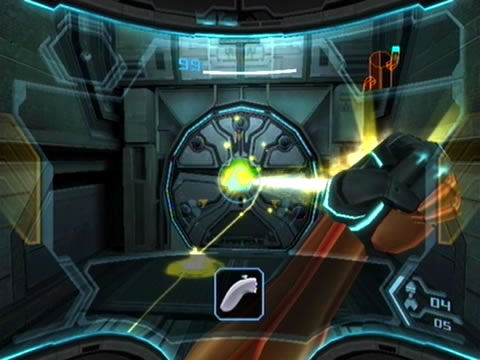
The first of many Grapple Beam upgrades.
Scan the computer terminal beside it for the Hunter Rundas entry for your Logbook (and a blue credit). Shoot the single lock on the door panel nearby to gain access to your new toy.
The Grapple Lasso grants Samus more than a funky new appearance for her left arm. Unlike before, you'll be gradually upgrading your Grapple Beam abilities; so far this item allows you to tear off mounted blast shields and personal shields carried by various Space Pirate foes. Step through the corridor and scan the terminal beside the sealed door you discover to summon a control interface. Follow the on-screen instructions to reactivate a handy elevator. Ascend the shaft and proceed on ahead. Watch out for hostile Crawltanks in the Hub Access chamber, and quickly dispatch the Pirate Militia right after it defeats a GF Marine.
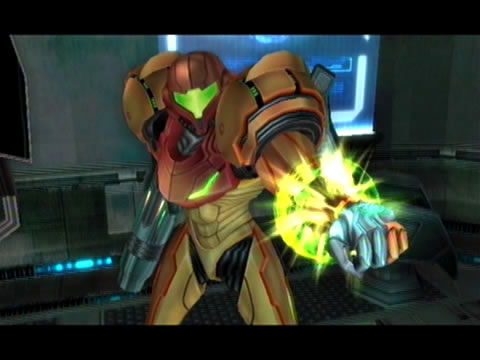
Step ahead through this chamber to discover a door sealed over with a mounted blast shield. See the large C icon hovering over it? Scan the door first, then lock on and cast the Nunchuck forward to deploy the Grapple Lasso. Pull it back to tear the shield off (fun, eh?). You'll also notice the blast shield shimmering yellow; any object casting a similar yellow glow can be grappled even if the C icon doesn't appear.
The Wii Remote's motion controls at work.
A grim sight awaits you in the Cargo Hub beyond. Numerous GF Marines lie motionless throughout the chamber, with the walls themselves wracked with weapons fire damaged. Step forward to find yourself ambushed by a round of Aeromines, quickly clear them out and move onward to discover two more rounds of the hostile air units. Clear them all out before taking a look around.
You'll spot a thoroughly damaged circuit panel near a sealed door, not much you can do about it now. Near the entrance of this area you'll discover a shimmering panel - grapple it off to discover a small terminal tucked behind it. Activate the terminal to raise a nearby chute, then climb in with the Morph Ball and follow the narrow network of tunnels to discover your first Missile Expansion, NO.01 (don't forget to make use of the Spring Ball). Return topside and move through the Cargo Hub, scanning objects as you go to learn that all three generators are still offline.
Down the far end of the area lies the collapsed debris of a nearby roof section. See the shimmering panels at its base? Use the Grapple Lasso to clear the way, then squeeze through using the Morph Ball. Beyond you'll discover a tall sealed door leading to the main control tower, but without power to all three generators it won't budge. Instead, turn around and head through the opposite door (notice a plaque beside the door reads "Generator A Access").

The Pirates relentlessly seek their prize.
Inside you'll discover a ruined curved walkway full of exposed heated conduits - not something you can easily pass over. Instead, see Energy Tank NO.01 floating inside a narrow tunnel lining the wall? Use the Morph Ball and hop into the tunnel, picking up the item as you go. Wait for the air-circulation pistons lining the walls to retract, then quickly roll through before they extend again. Once safely through move on through the door ahead.
Travel through the Conduit A chamber to discover three unlucky GF Marines taken down by a number of energy grenades. Fry the culprit; a lone Pirate Militia down the far end. Move forward and look for a red blast-shielded door on the right. Scan the blast shield to learn that a single Missile will breach the cover. Send a single Missile into the shield and enter the small chamber beyond. Here in this cozy map station you'll find Logbook entries for Valhalla Incident, Hunter Ghor and Hunter Gandrayda. Before leaving be sure to access the map station in the center to give yourself a complete view of the Federation facility.
Return to Conduit A and continue down the corridor. Watch out for falling debris along the way, use Charge Beam blasts to clear your path. Also keep an eye out for Jumpmines on the ground: small little objects placed by Pirate forces to ambush unwary travelers. Scan one for your Logbook before dispatching them from a distance. Breach the red blast shield at the far end of the corridor with a Missile and move on through.
Beyond lies the outdoor Cargo Dock A region - and plenty of action. Step down to the deck to find yourself sealed in as a pack of Pirate foes attack from the opposite side of the deck. Use the scattered crates and equipment for cover, and try to scan one of the Pirate Troopers among your attackers. Blow open crates if you need health and don't forget to use Missiles against your enemies.
Space Pirate ATCs are certainly not in short supply.
Clear the first group and watch as a huge troop deployment craft hovers down to deploy two more hostiles. Scan the vehicle to reveal it as a Space Pirate ATC - you're certainly going to see plenty of these throughout your travels. Quickly scan one of the pair of Pirates to learn that these Shield Pirate Militia each carry a personal shield. Not to worry, simply lock onto one and deploy the Grapple Lasso, pulling it back once attached to rip their shield away. Whenever you spot Pirates carrying shields simply perform this action to make them vulnerable.
Deal with both to receive the next wave - a pair of flying Pirates equipped with odd jetpacks. Scan one to reveal them as Aerotroopers. These hovering foes can be hard to lock onto, if you manage a lock fire a homing Missile or two. Watch out for any bombardment they throw at you, remember to use cover and dash-strafe when locked on. Always keep your distance, as the age-old trick of dive-bombing you once defeated certainly isn't forgotten with these guys.
With both Aerotroopers down an ATC will return, this time to attack you personally. Lock on and keep dash-strafing left and right to avoid those nasty purple plasma bolts. Use suppressive fire against the small yellow vent on the craft's nose, this is its only weak point. Keep your attacks up to eventually shoot the craft down. Don't think that's the end of it however, as a cutscene will announce the arrival of four (!) more ATCs.
But thankfully you won't need to deal with these, as your fellow hunter Rundas streaks in from above, riding along ice sleds in the air (it's definitely a sight to see). He'll effortlessly dispatch all four hostile aircraft before joining you on the deck below.
After informing you that the Federation is allowing the use of ship-command devices, Rundas takes off to deal with one of the other generators - good to hear you won't need to activate all three. Four landing beacons then appear on the deck, so it's time for the Command Visor's entrance. Hold minus and point to the bottom-right of the screen to activate the Visor. See the orange icon at the center of the landing pad? Lock onto it with Z and hold there until your ship receives the command to arrive.
Three generators must be restored to power the cannon.
Once your ship sets down the two sealed doors holding you here will release, clearing your path to Generator A. Be sure to save your game first before moving on. Enter the Generator A Access chamber ahead and deal with any pesky Crawltanks along the path. Down the end of this corridor lies a door with a unique blast shield - scan it to learn that small optics need to shot at before the shield can be ripped from its mounting. So simply fire at the small lights on the door as they appear in sequence, then tear the door off with the Grapple Lasso when the C-icon appears.
Step inside to finally discover the vast Generator A chamber. As you step forward you'll immediately spot two Aerotroopers and their handiwork - a huge batch of small mines placed all over the generator. As the Aerotroopers retreat the mines will detonate, doing a number on the generator but not enough to render it useless. A huge wall panel covers your exit so you'll need to restore power to the generator before leaving.
Scan all the pieces of equipment here, you'll learn that three security panels need to be realigned before the generator can return to its original position. See the glowing red command station down the far end of the chamber? You'll need to head up there to start the sequence. But as you step down to the circular platform a number of hovering drones ambush you from below and begin circling their prey.
Quickly scan one to reveal them as Jolly Roger drones, nasty little pieces. Try to pick off shots as they circle you, but watch your radar and quickly face any that stop to fire at you (curiously, if you walk back up the ramp they all mysteriously vanish). Deal with all the hostiles to regain access to the command station up above.
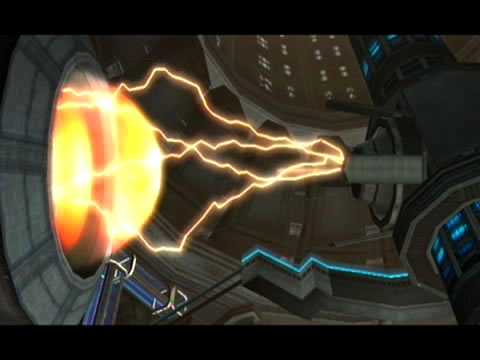
Climb up and clear out the debris blocking the interface terminal Use the terminal and follow the on-screen instructions to restore the generator back to its default position. Upon doing so, a hand scanner will activate way over at the generator's main control console. Climb back over there and activate the switch to instantly restore power to this generator and bring it back online.

Federation PED Marines outclass the Pirate Troopers.
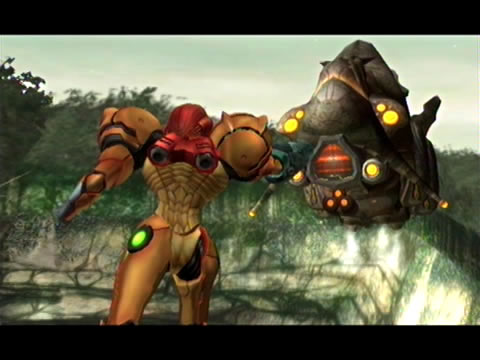
Now that wasn't too bad... except now you've got bigger problems to worry about. Admiral Dane chimes in with a report of something huge heading your way. A cutscene then depicts a colossal grotesque object emerging from a wormhole above the planet - it's intentions couldn't be clearer. With Generator A happily working away, exit the chamber and return to Cargo Dock A. Once there you'll witness a firefight between a group of Pirate Troopers and GF Marines. The battle doesn't bode well for the Marines, until the last one standing activates a Phazon-powered weapon system and effortlessly fries all three hostiles.
Scan this Marine to reveal him as a Phazon Enhancement Device (PED) Marine. Although his weaponry can certainly deal with any threat, that can't be healthy carrying Phazon around everywhere. Speak to him quickly before stepping toward your ship. As you do you're in for a surprise: the Marine exclaims "what the heck is that!" right before a huge swooping shadow flies overhead and the unmistakable form of Ridley comes into view. Strangely, instead of attacking you directly, your nemesis attacks a section of the facility beyond the chasm before flying out of sight.
Save your game here, then return to the Cargo Hub. On your way back through Conduit A you'll meet another PED Marine, he'll offer advice to watch out for Pirate traps up ahead. Clear out the Jumpmines and Crawlmines on your way through. Once back in the Cargo Hub, roll through the debris back towards the western side. Remember seeing a giant sealed door on the southern side of this chamber earlier? You'll witness a gigantic mechanical creature demolish the door as it battles what looks like a Berserker Knight.
After a short scuffle the giant machine wins the fight, putting the Berserker Knight down for good. Although it may not seem like a good idea, step towards the mechanical beast to see Ghor promptly leap down out of his exoskeleton. He'll urge you onward to Generator C, so with that huge door no longer barring your path let's get moving. Shoot the four linked cables attached to the blast shield ahead then simply rip it off with the Grapple Lasso.
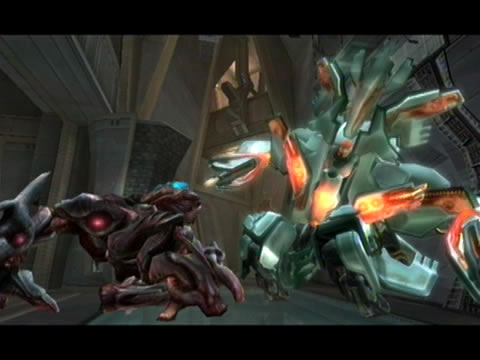
Ghor easily dispatches a hapless Berserker Knight.
Before stepping through the door you'll receive a transmission from Aurora 242. That massive object heading for Norion apparently contains massive Phazon reserves - this is sounding more and more like the incidents at Tallon IV and Aether, except this time that planetary cannon tips the odds in the Federation's favour. Travel through the chamber beyond and help the pair of PED Marines clear any hostiles along the way. Don't worry about the white blast-shielded door here, you'll find out what's in there later on.
Beyond here lies Conduit C. Watch out for Jolly Roger drones, Crawlmines and Jumpmines as you move through this area. The walkways throughout are are a complete mess; if you travel around the lower level you'll eventually find your path blocked by a damaged walkway section. Follow the upper level instead to eventually find a small opening tucked along a wall. Roll through with the Morph Ball to eventually bypass the blockage. Move onward outside to the Cargo Dock C area.
As you enter Cargo Dock C you'll spot a small tunnel coverplate inside an alcove ahead. Aurora 242 chimes in again, urging Samus to hurry. Activate the Morph Ball and lay a bomb beside the coverplate to blow it off, revealing a narrow tunnel beyond. Roll through and follow the pipes. Keep on your guard however - your best buddy Ridley is nearby.
As you travel through the pipe sections furthest out from the structure Ridley hops down atop the pipe, sealing you in with his claws. He'll then proceed to fire bolts of plasma straight down and try to bite Samus - keep yourself rolling back and forth to avoid harm. Stay still and wait for the guiding laser to appear first, then roll clear before the plasma beam hits.
Ridley takes advantage of a tight situation.
Once Ridley's frantic gnashing causes him to jam on the pipe, roll nearby and lay a few bombs to give him a nasty jolt. Repeat this process again and his claw will release from the pipe - don't miss your chance to escape. Eventually Ridley will return along another outer pipe section for another shot at you. Repeat the same process as before to escape his grasp.
Now if you managed to escape both encounters with Ridley without a scratch you'll receive the bonus Flawless Escape Friend Voucher, but this won't be an easy task. You'll need to avoid taking damage at all, so be sure to avoid rolling into his motionless claws by accident. Don't travel too close to his mouth when laying bombs, you don't need to be too close.
If you fail and really want to score this voucher, simply restart back at your gunship over at Cargo Dock A - at least you won't have much travel time to arrive here again. Step forward into Generator C Access - as you do so Rundas chimes in with some good news, he's managed to get Generator B back online. So now it's all up to Samus. Clear the annoying Crawltanks here and be sure to save your game at the nearby save station. Move around to the mounted blast shield on the door ahead - shoot the optics before using the Grapple Lasso to access the door.

Gandrayda's an expert of infiltration.
Walk on through to finally arrive at Generator C. But you're not alone, as five Pirate Troopers all ready themselves to attack. But without warning, one of the five attacks the other four, quickly sending them all plummeting down the generator shaft. Now I wouldn't put it past a lone Pirate to want to fight Samus alone for all the glory, but that theory is thrown out the window as the lone Pirate Trooper morphs into Gandrayda.
So that's what she's been up to, sneaking around among the Pirates looking like one of their own (but I wonder how she manages to copy their active weaponry as well?).
Gandrayda leaves the generator to Samus, so let's get to work and power this thing back up. Scan the equipment to learn of the generator's status, then climb up to the maintenance station on the far side of the chamber. Activate the terminal there to bring the generator's security panels into place, but the main generator unit will stall as it slowly lowers. A Bomb Slot within each security panel activates, while a small hatch near the entrance of the chamber opens, granting you access to the maintenance tunnels.
Head over to the opening and roll inside. Move through the tunnels and lay bombs at the small jets to launch yourself higher. Watch out for a pesky Jolly Roger drone firing at you, try to ignore it and focus on reaching the Bomb Slots. Activate all three to fully extend maintenance tracks above your position (watch out for the electrified sections of the tunnels), then keep following the tunnels to eventually find yourself up above the generator.
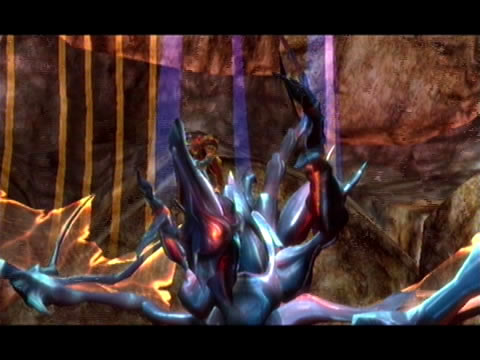
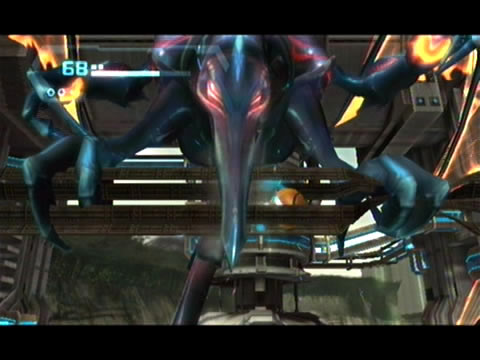
Samus fights Ridley in an unforgettable battle.
Keep going to find yourself landing inside a Bomb Slot right at the top of the generator. Plant a bomb to release the generator and allow it to return to its neutral position below. Now all you need to do is simply activate the hand scanner down below to energize this generator - except Ridley's got other plans for you. Watch as he emerges from the shadows above the generator and dive-bombs Samus, sending her plummeting down the gaping shaft below.
You're now in for one of the most memorable fights in Metroid history. Ridley joins you on the massive 17,000-meter plunge down the generator shaft (that's 17 kilometers!), so you'll need to conquer him before making a sizeable crater at the base. Refer to the bosses guide for tips to survive the main part of the fight.
With Ridley sent plummeting into the abyss, Samus' situation doesn't look good. Luckily for her Rundas has arrived and pulls her to safety thanks to his ice-flight ability. With the pair arriving back up in Generator C, he tells Samus to restore power and meet himself and the other hunters at the main control tower (along with stating the obvious - Samus owes Rundas big time). Simply walk over to the now-active hand scanner and hit the switch to restore power to the generator, at last bringing the planetary cannon back online.
Chapters:
- GFS Olympus
- Meet the Hunters
- The Liberation of Norion
- Heroes Corrupted
- A Broken World Ravaged by War
- The Deadly Phazon Threat
- A Fallen ally
- Samus' Gunship on the Frontlines
- Disabling a Leviathan's shield
- Heart of the Phazon Corrupter
- Chozo Paradise Among the Clouds
- Restoring Aurora Unit 217
- Hunting the Rogue Machine
- Uncovering Bryyo's Secrets
- Ghost Ship
- The tip of the SkyTown Iceberg
- Piecing together the Leviathan's Bane
- The Metroids Arrive
- Save the Second Chozo World
- The Pirate's Homeworld Unveiled
- Rescue operations in Enemy Territory
- The Final Chozo Gift
- Repositories of Chozo and Pirate Worlds
- Phazon Mines Part 2
- Breaking out the Heavy Weaponry
- Storming Pirate Command
- Join the Federation's Leviathan Strike
- Return to Norion
- Excavation of the Bryyo Ruins
- Bryyo's Final Bow
- Charting out the Ruined Valhalla
- Aurora 313's Final Message
- Ridley's Final Phazon Fight
- Opening the Wormhole
- The Source of the Poison
- The Masters of Phaaze